Carburetors
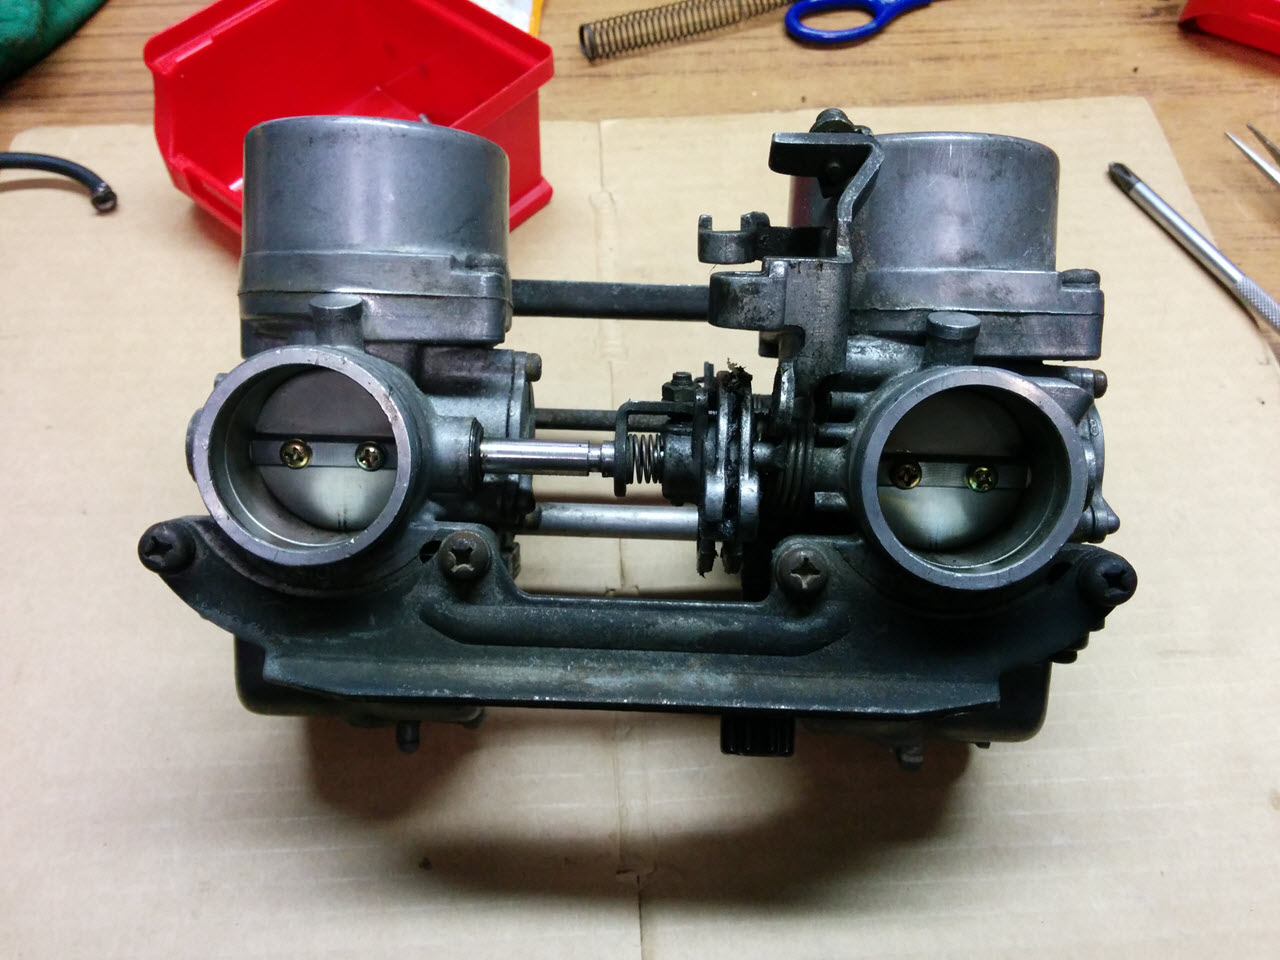
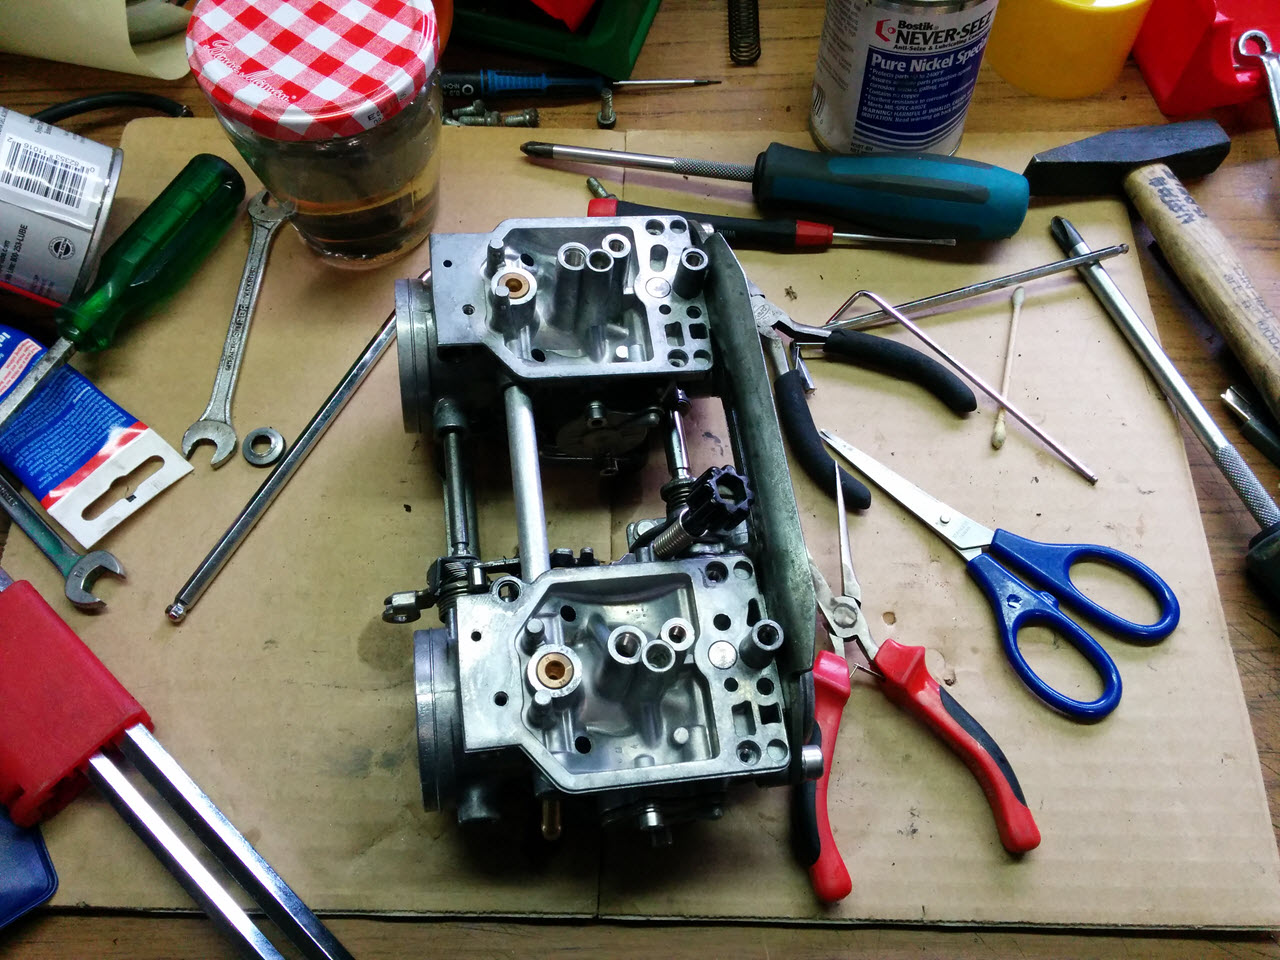
Although usable, the carbs were very dirty when I got the bike. I cautiously took them apart, and took lots of photos so I could remember how everything went back together afterwards.
The whole process is documented, please have a look at this page for that reference material. [NEED TO ADD LINK HERE]
The Air-cutoff Valve issue
Ever since the carburetors were cleaned, maybe even before, the bike had issues with highway speeds, the overdrive gear was useless.
It would react very sluggish at low revs, even to the point of stalling whilst doing slow manoeuvres.
After the bike idled for a longer period, the plugs looked extremely sooty. The oil also reeked of gas after a while. Playing with the idle screw yielded almost no effect. It was clear that something was up with the idle circuit.
Since I had no experience and no tools, I purchased a "colortune" plug. This helped my isolate the issue as being a very rich condition at low revs, okay-ish at higher revs.
Since I did not know the details of a typical VB carburetor, I was unable to resolve the issue at first.
I had to run through all the things that were changed after the carbs were cleaned. One of the things that came to mind was the air-cutoff valve system.
Because the bike's fuel consumption was quite high, I had disabled this system by shutting off the vacuum supply. The system was apparently put in place for "consumer confidence".
It is only there to stop the exhaust from popping when the throttle is rapidly closed, causing a lean condition.
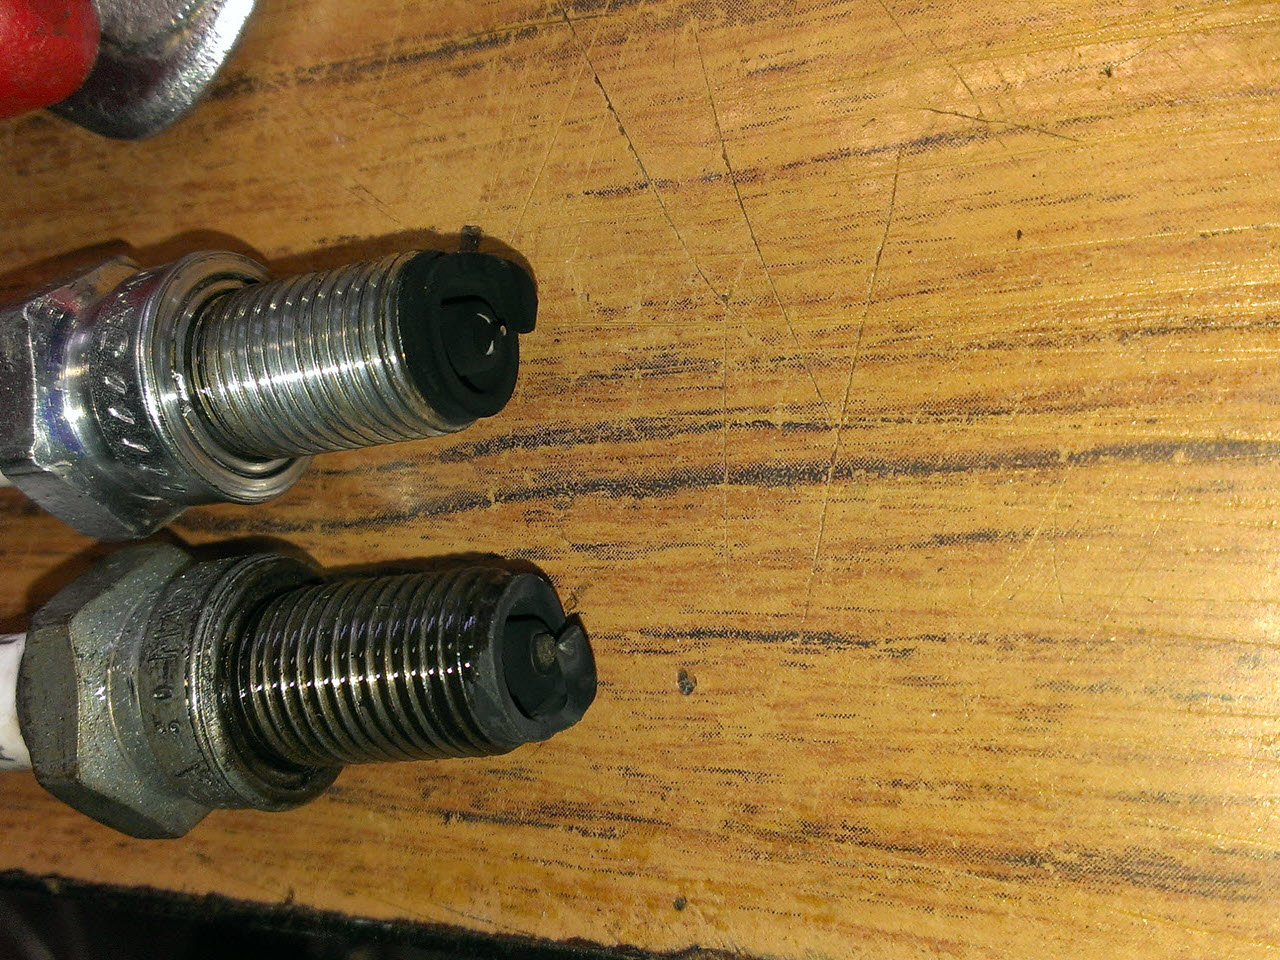
That is not how a plug should look.
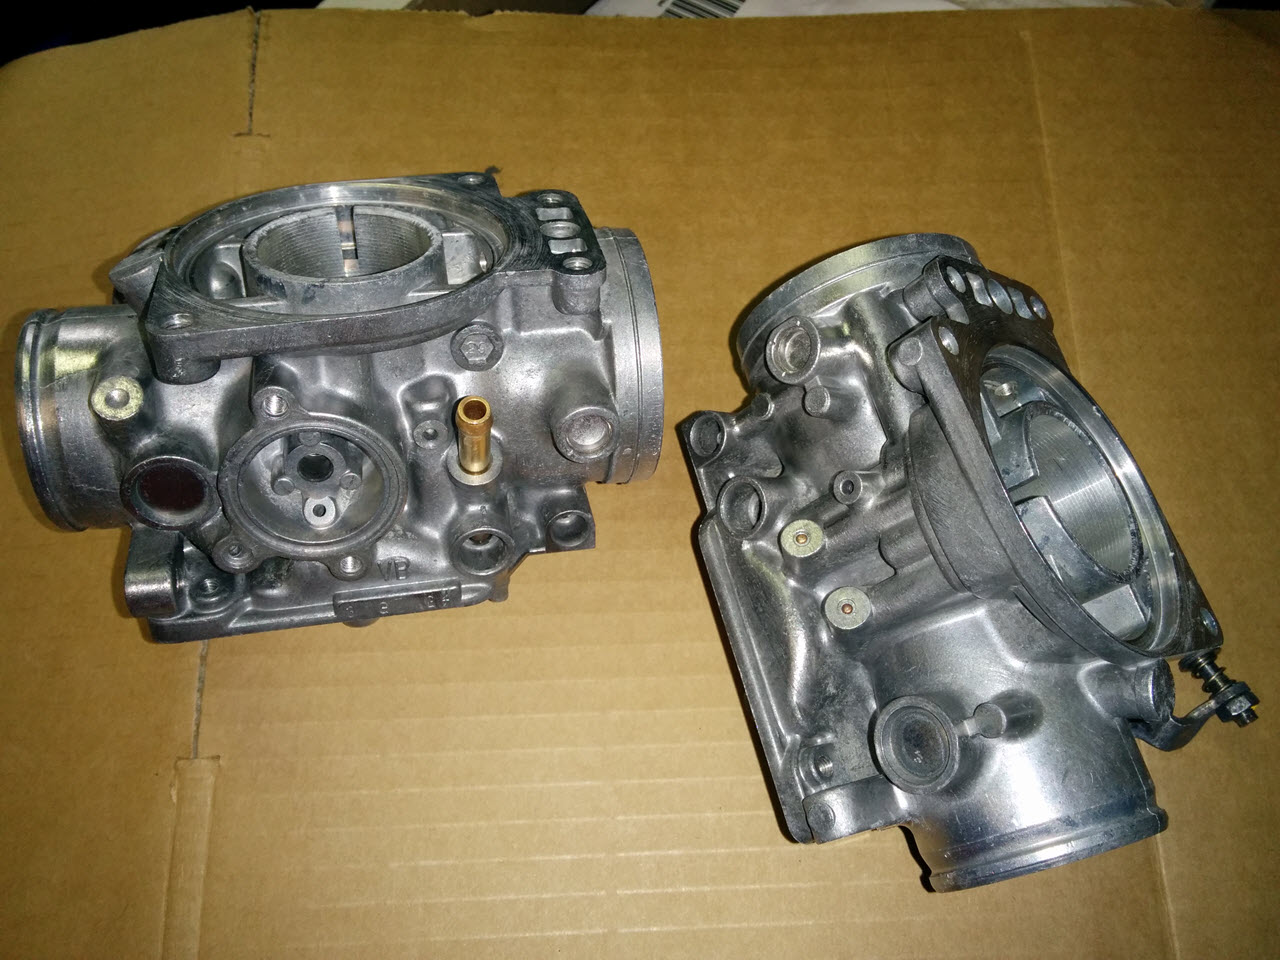
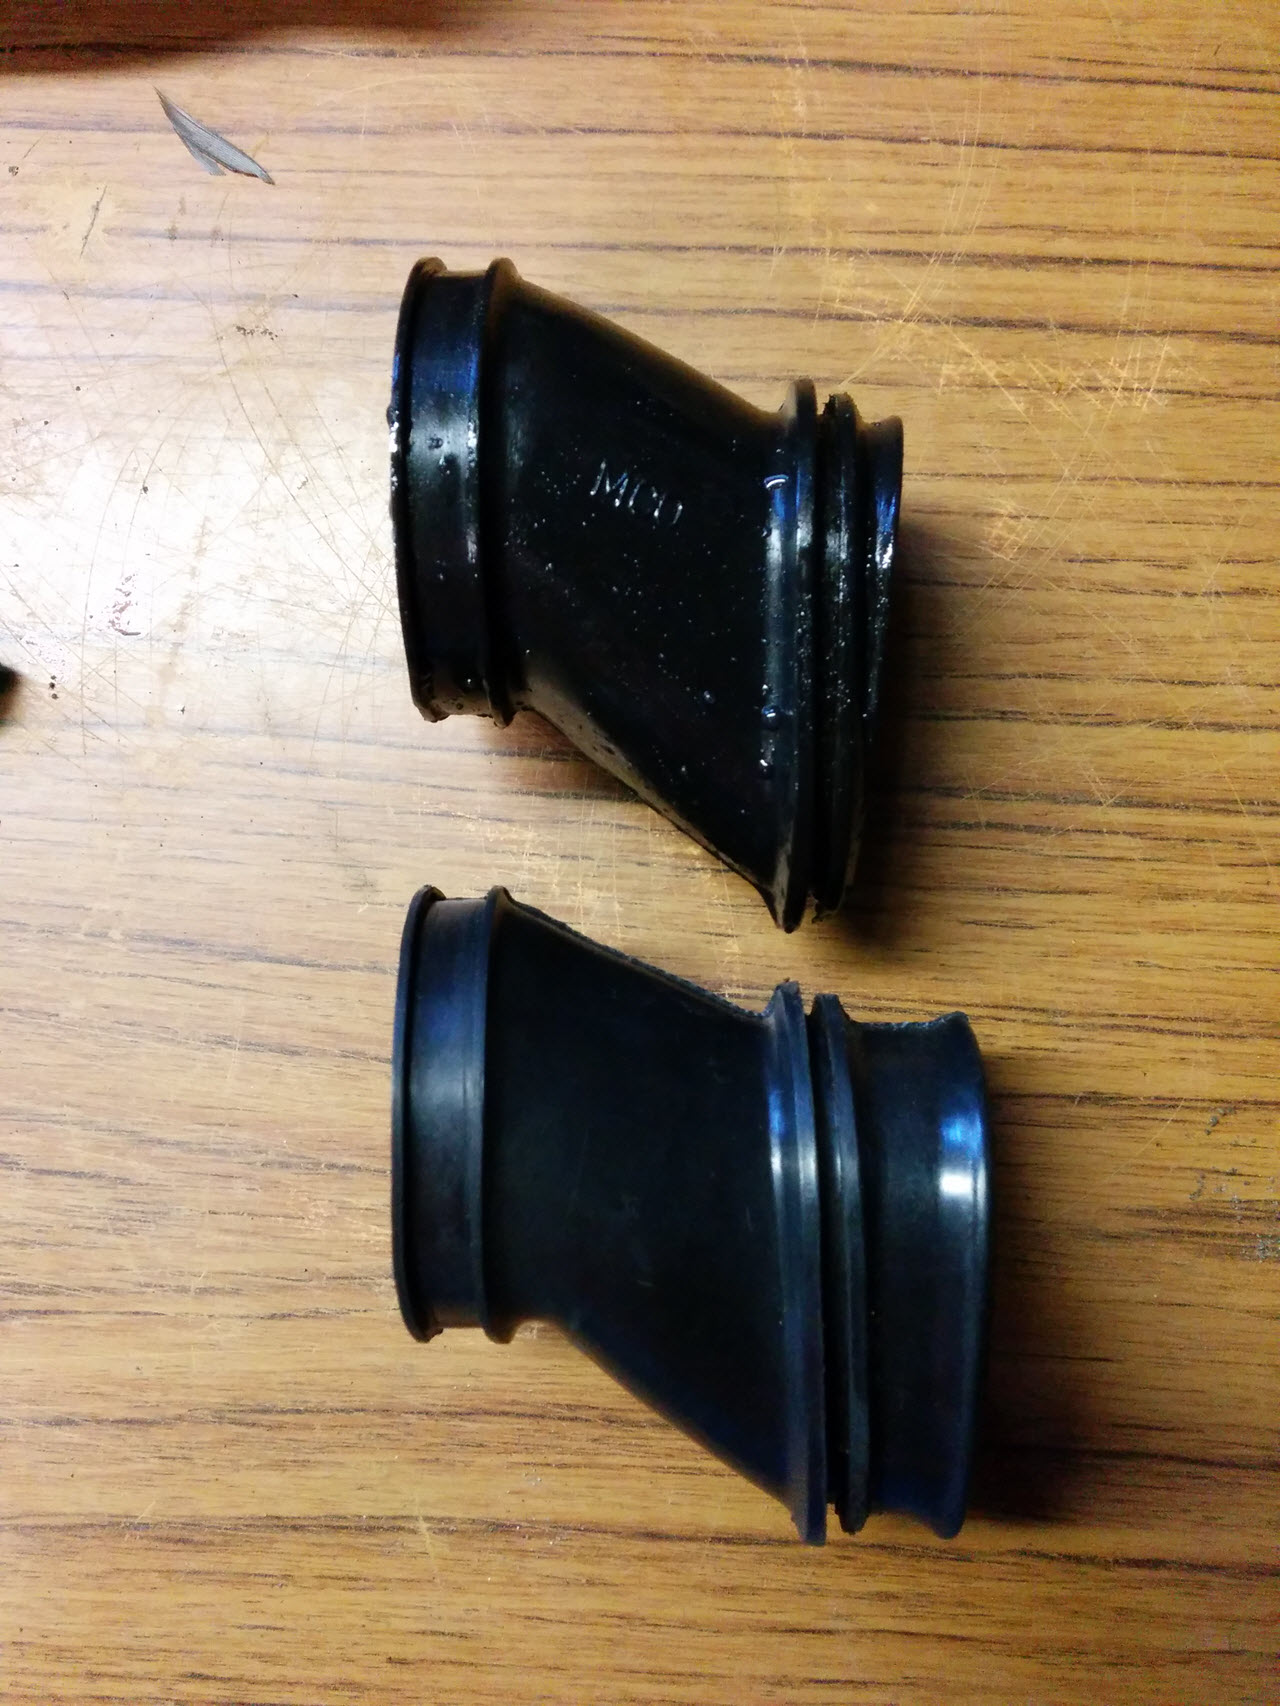
Left is what came off the carbs, right are the new ones I received.
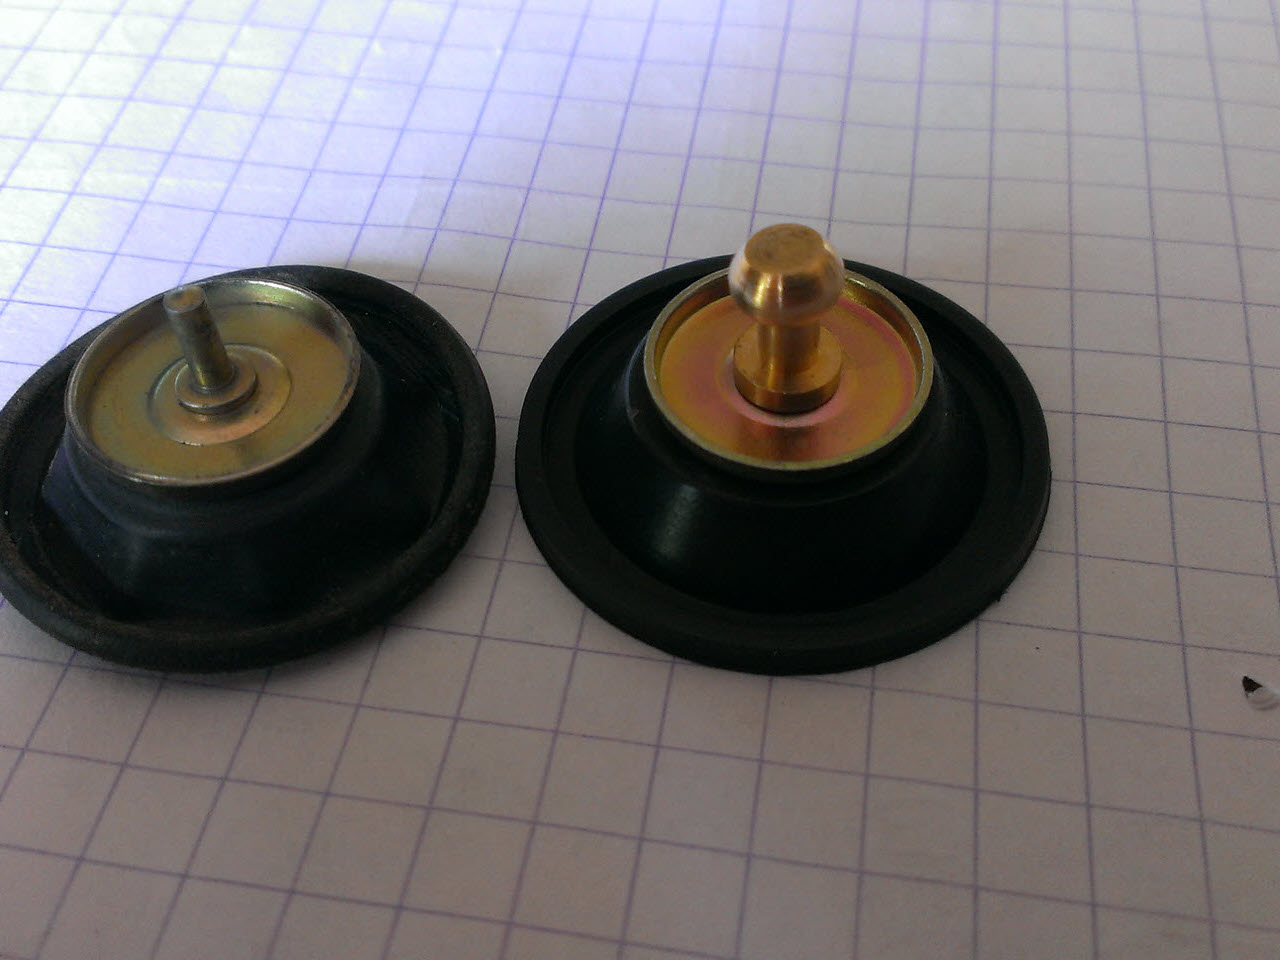
When I purchased new air-cutoff valves, I noticed that they were different from the ones I had.
What I received was this:
Air Cut-Off Valve Set Honda GL1100 CB900 CB750 GL500 CM400
KL18-2795
OEM: 16048-429-771
While what I needed was this:
Air Cut-Off Valve Set Honda CB1100 CB1000 GL650 CX650 FT500
KL18-2796
OEM: 16048-KB7-901
I read on the Nighthawk forums that a user called "zippy" just cut off the "bulbs" off these, and that they worked.
That did not work for me

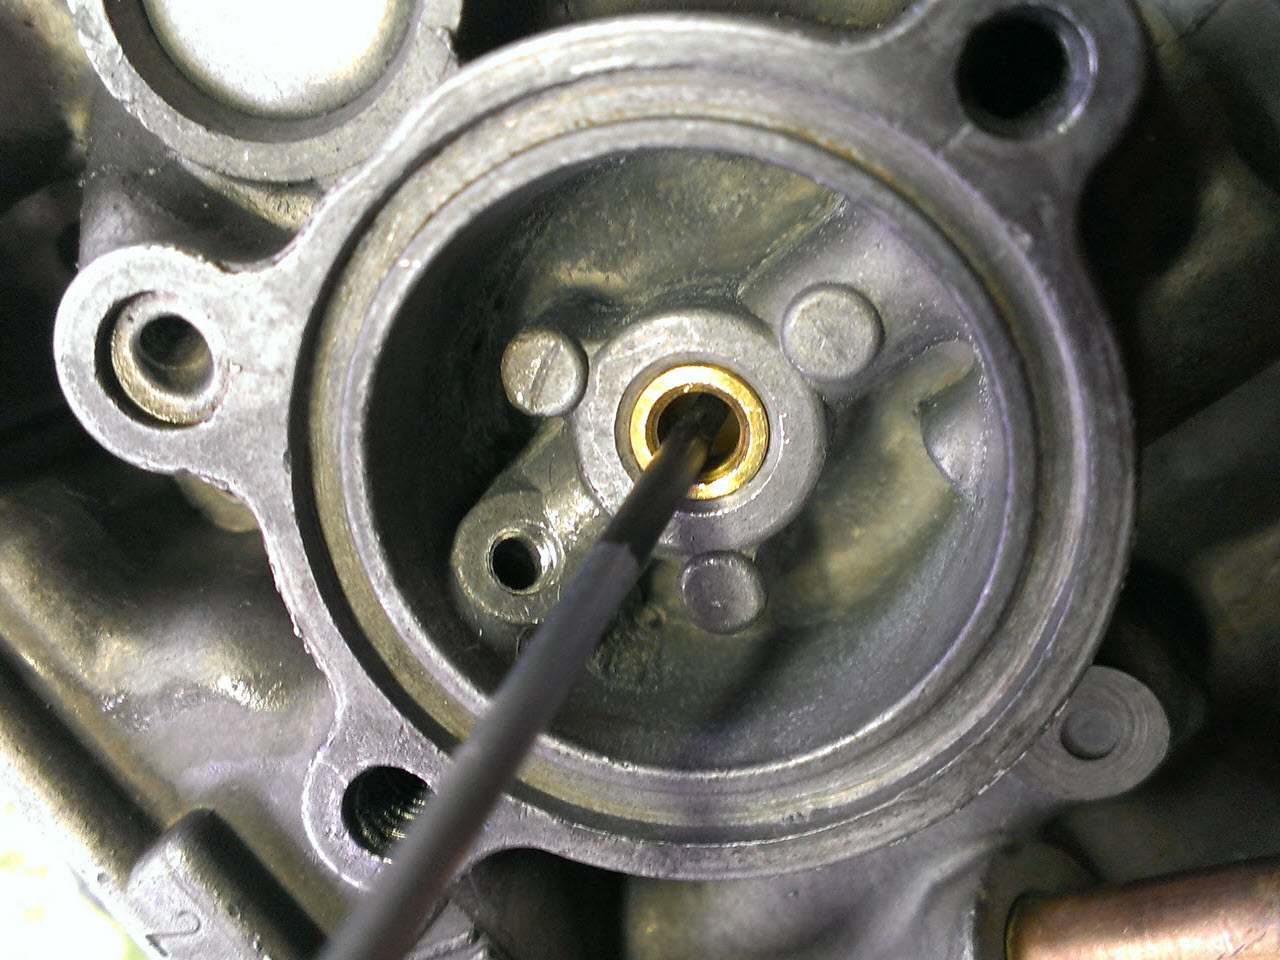
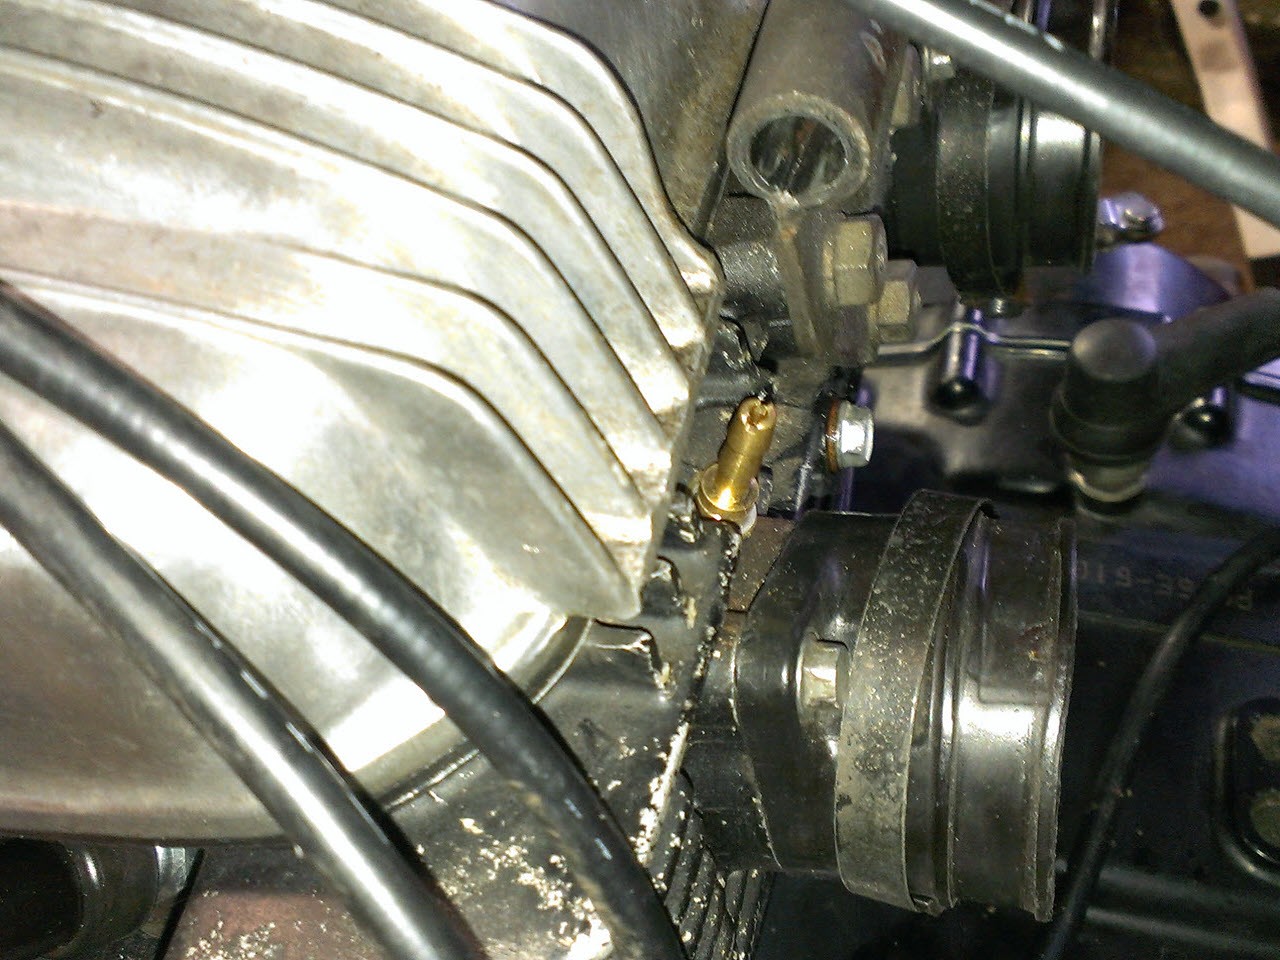
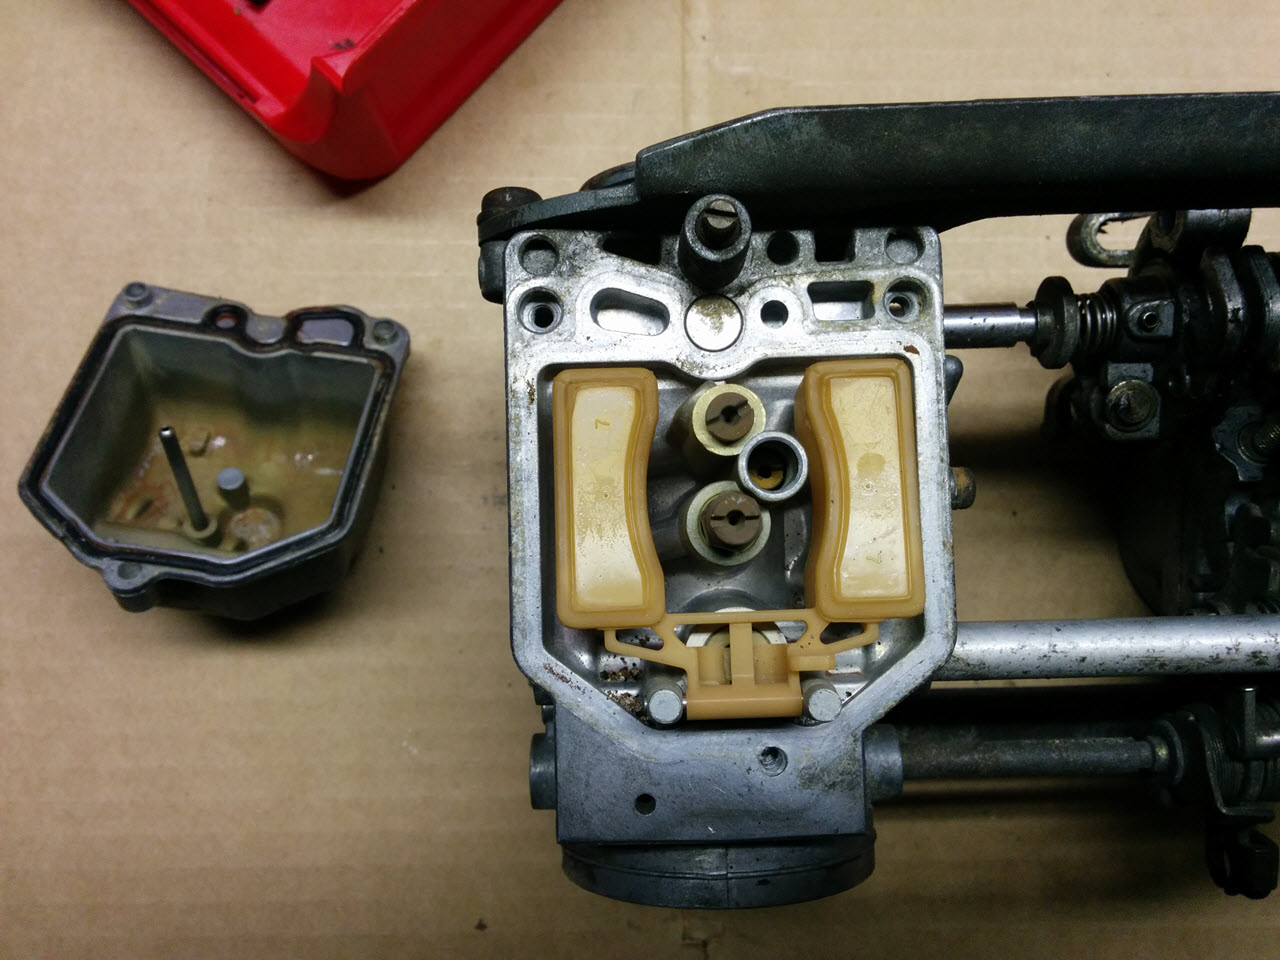
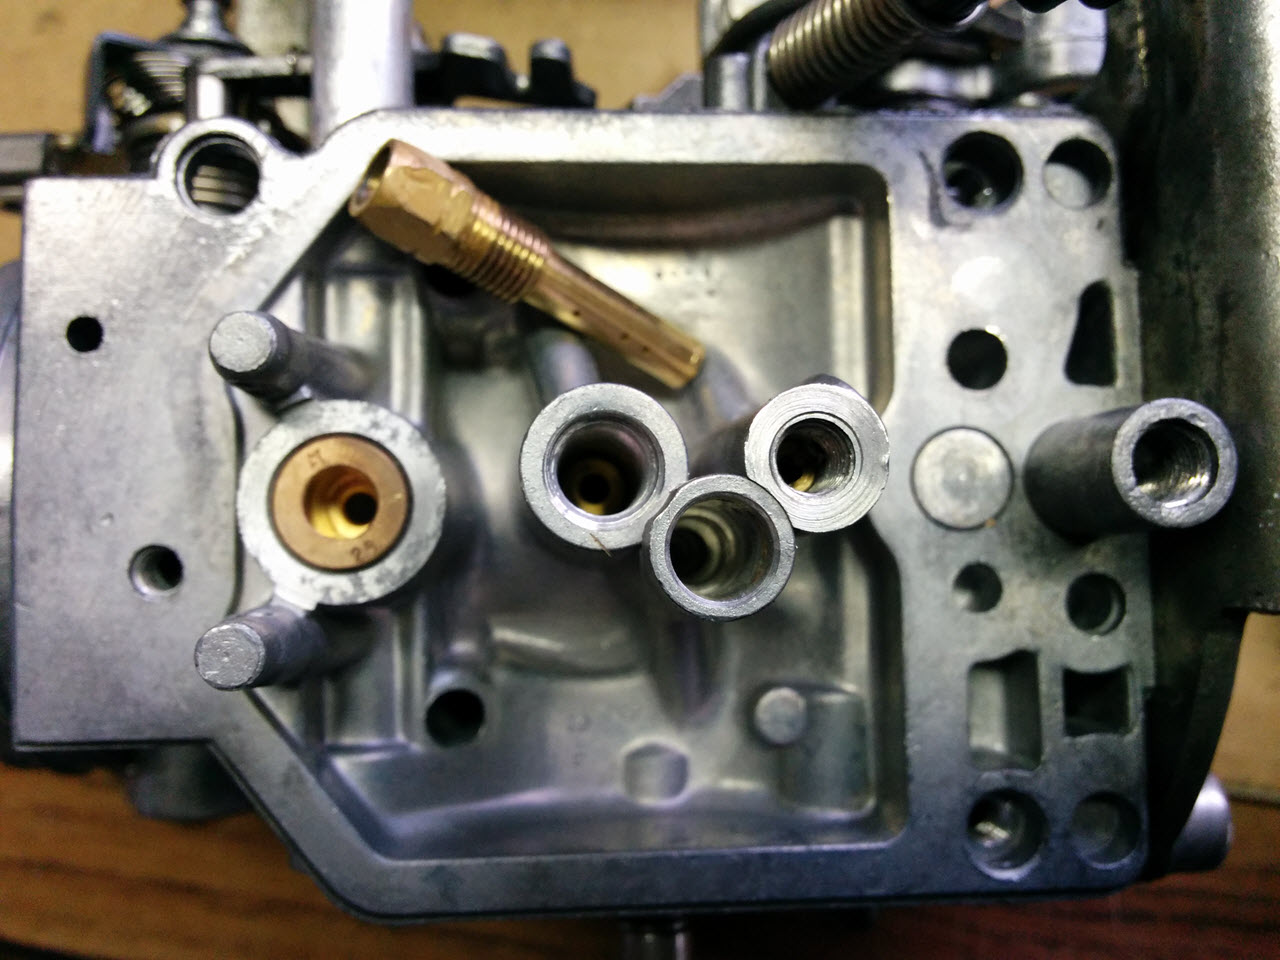
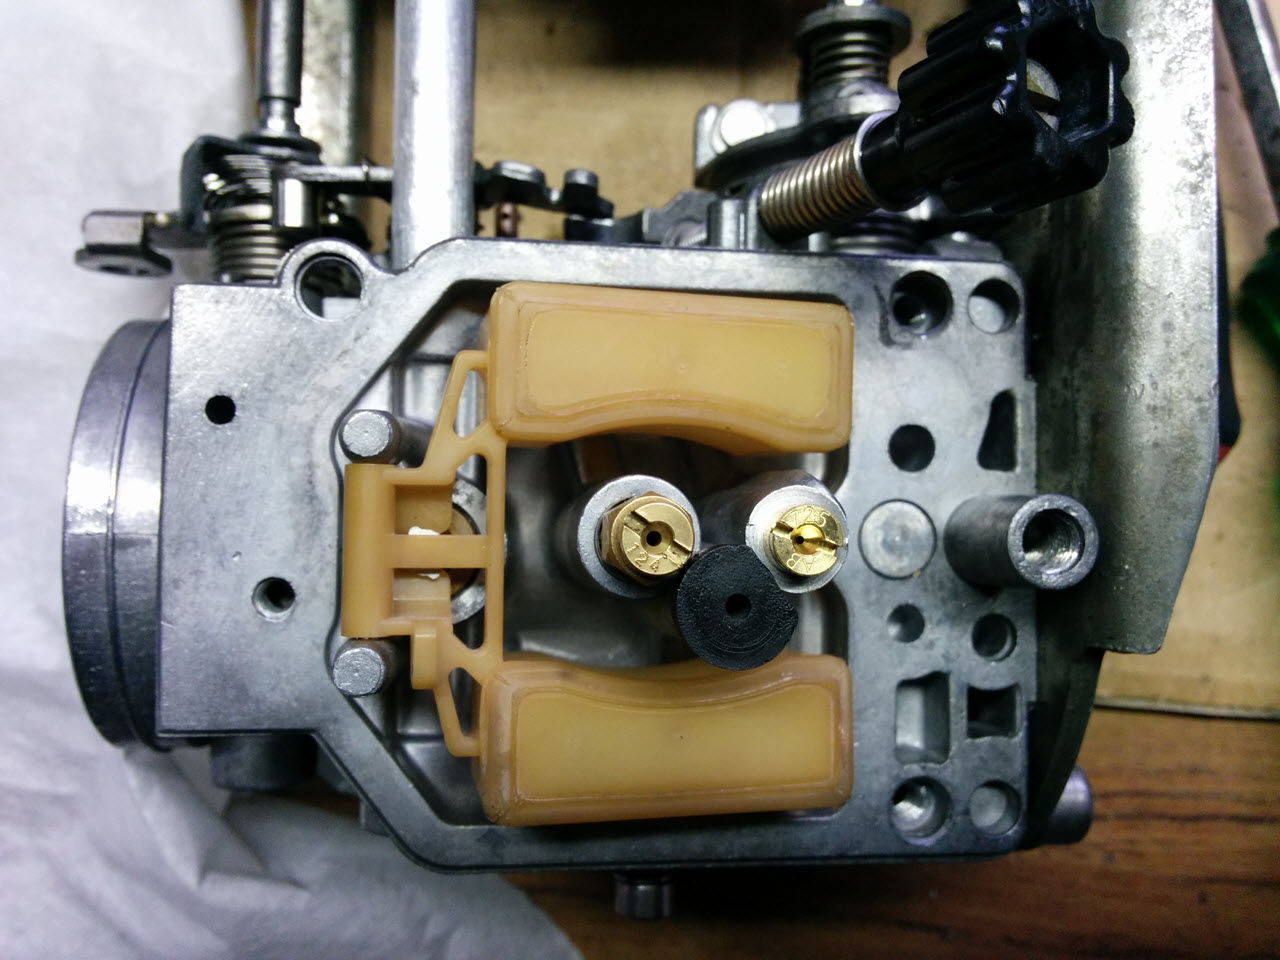
This is the air-cutoff circuit of the right carburettor:
- Hole 1 is a small hole located at the top, connected to the top cavity right under the piston.
- Hole 2 is where the pin on the underside of the air-cutoff valve (ACV from now) sits in
- Hole 3 is a big hole at the bottom, going to the idle circuit
- Hole 4 is where the vacuum pressure from the engine side comes from, it lifts the ACV up when a high vacuum condition is created
When I received the valves, I found Zippy's thread and decided to modify my valves too, overlooking the fact that he had ground them:
- 1. carefully
- 2. to original spec
- 3. to the correct diameter.
Hamhanded as I am, I got me a hacksaw and cut the bulb off, because I thought that the brass thing the pin slid in, was just a glider for the pin, to prevent the valve from shifting sideways under pressure.
A press with a screwdriver revealed other stuff. I actually tried closing off the holes one by one until I finally discovered how the system worked.
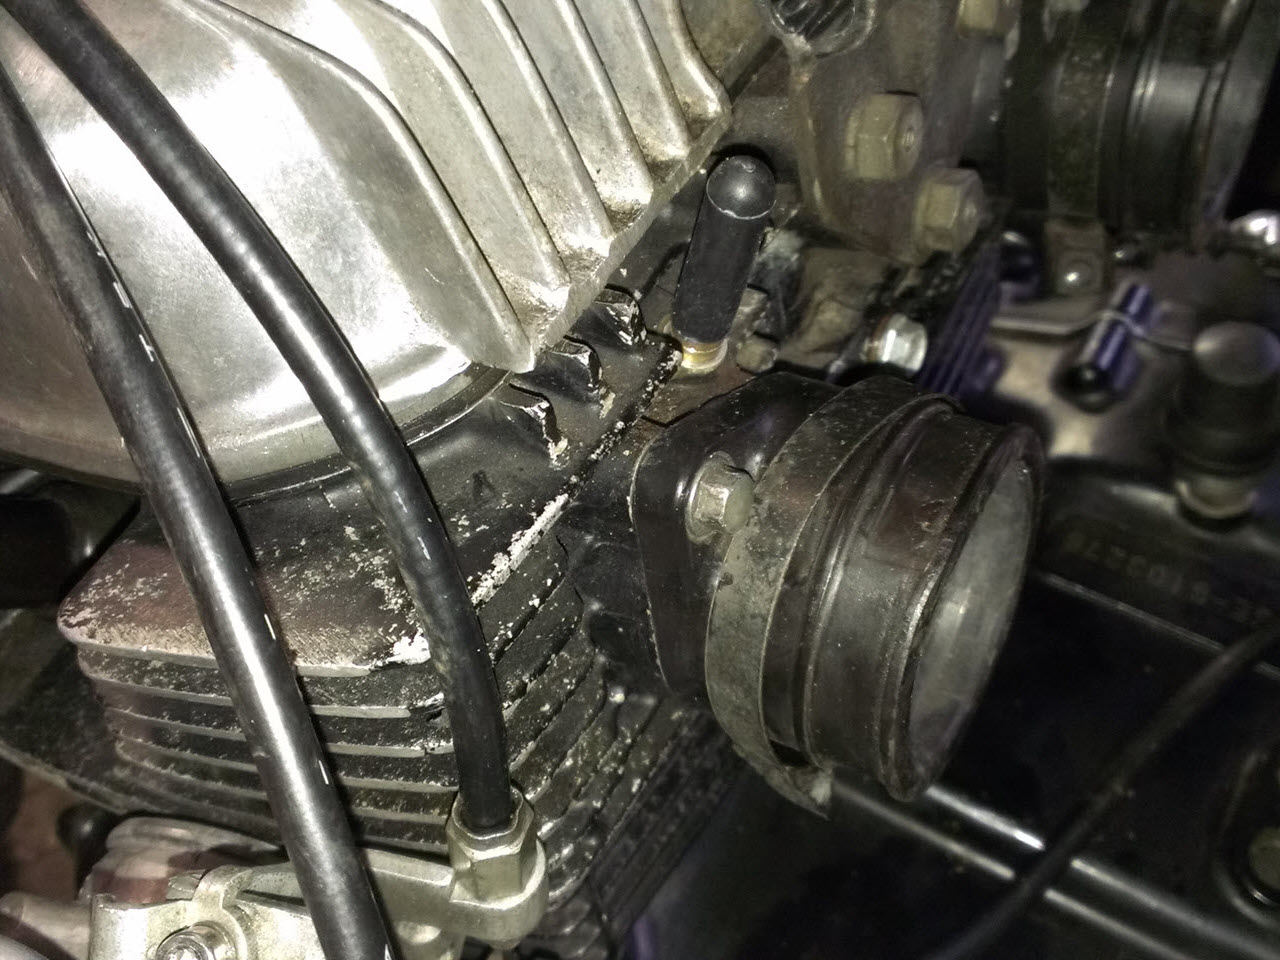
I removed the valve completely, then just put the ACV back in place and blocked hole 4 with a solid rubber grommet.
After reassembling the carbs, I screwed the mixture screw 2,5 turns out and mounted everything. It worked "out of the box", I did have to sync, but no more fouled plugs.
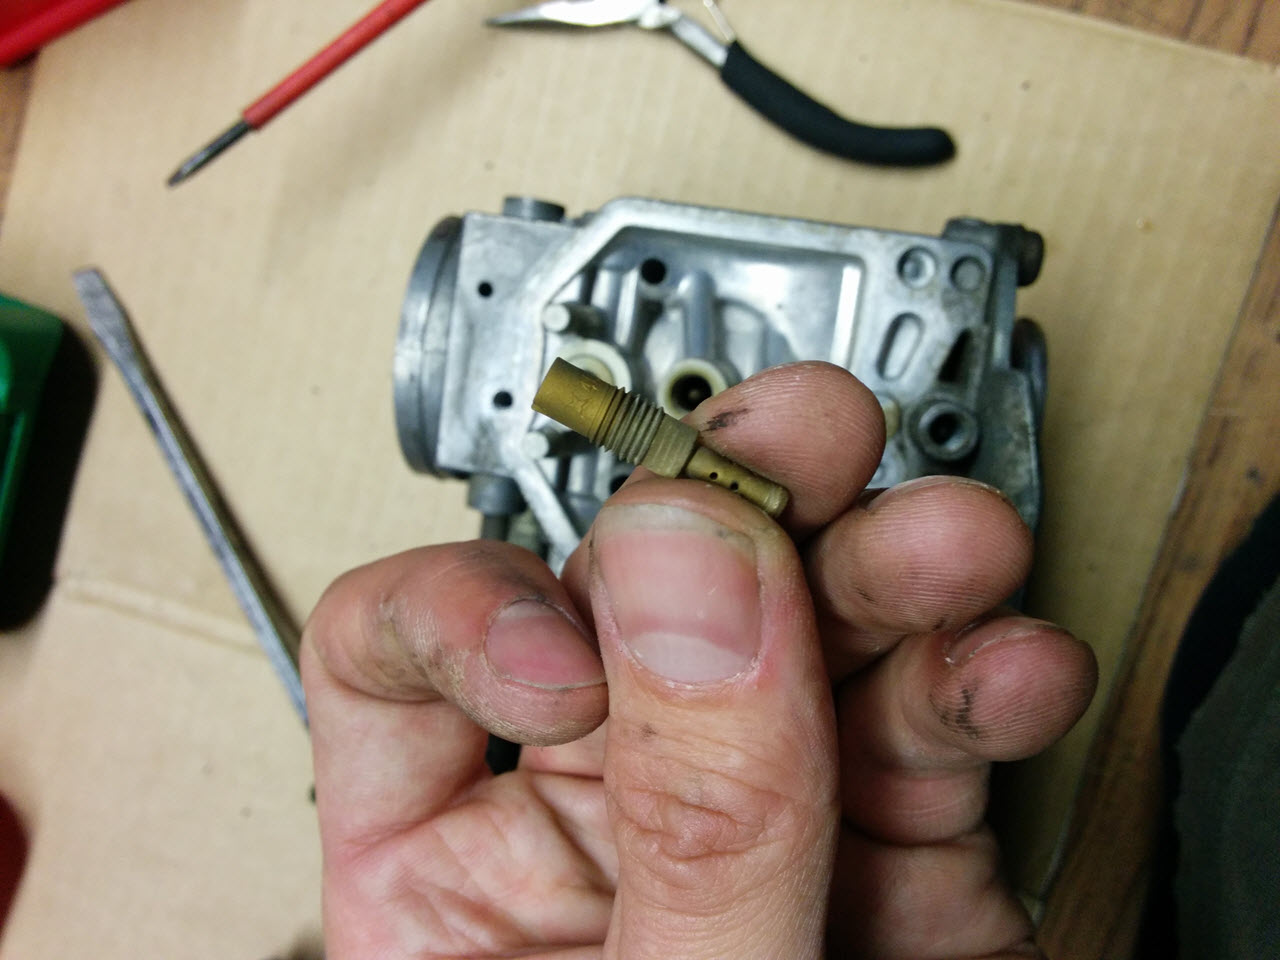
The plunger was easily mistaken for a brass plug.
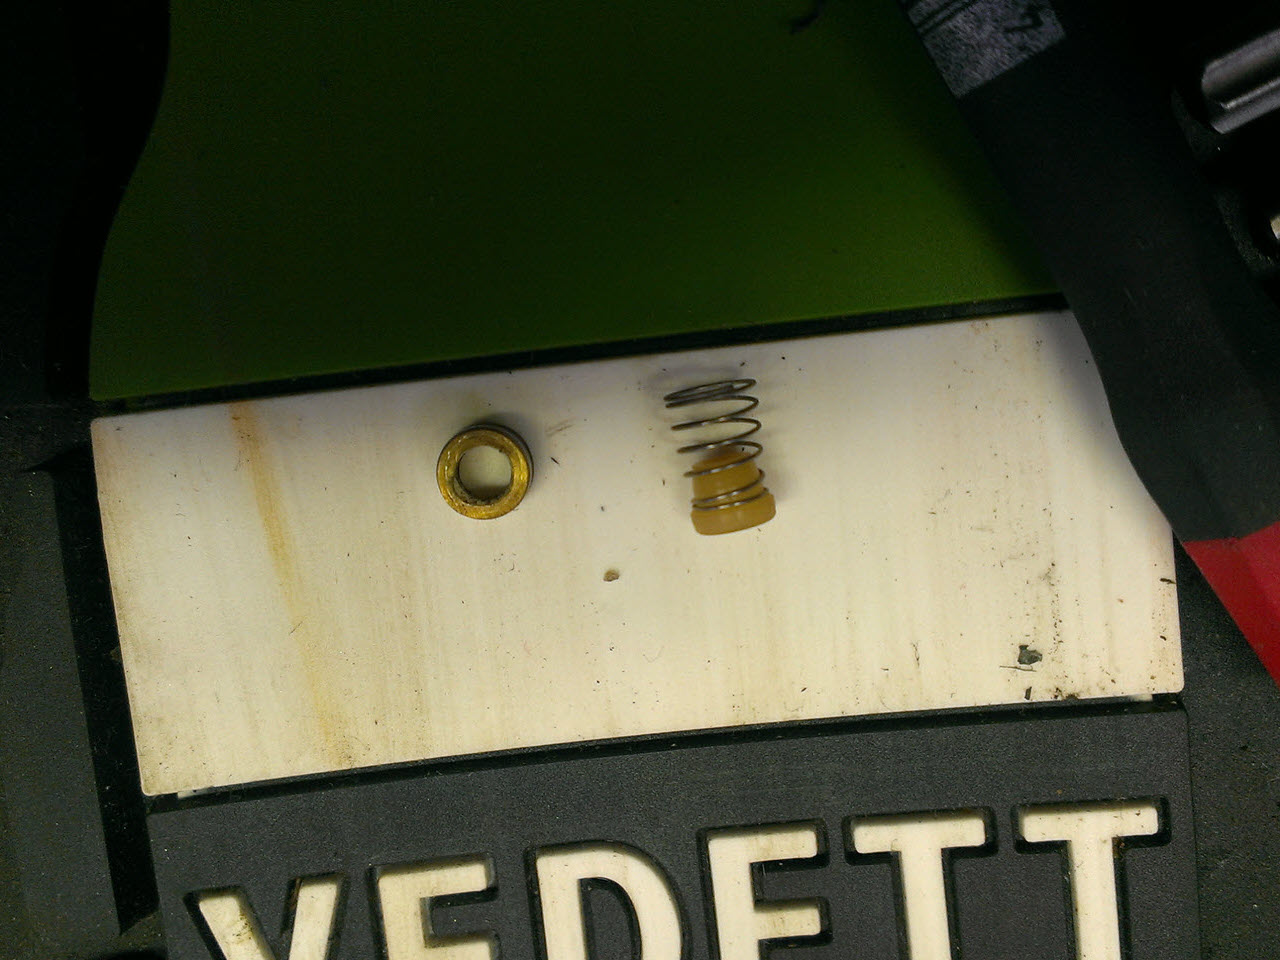
It took less than 5 minutes to take out the plungers and completely disable the ACV system.

I also ground down the stems on the diaphragms, as they were useless now.
Airbox and filter
The airbox was very clean. I replaced the stock filter, first with an Emgo one, then with a K&N filter. No rejet was needed for the Emgo filter, but the K&N filter required the main jets to be upped 2 sizes.
On the bottom of the airbox, there is a second filter, for the crankcase breather. This filter deteriorated completely whilst inside the airbox, and was a pain to remove.
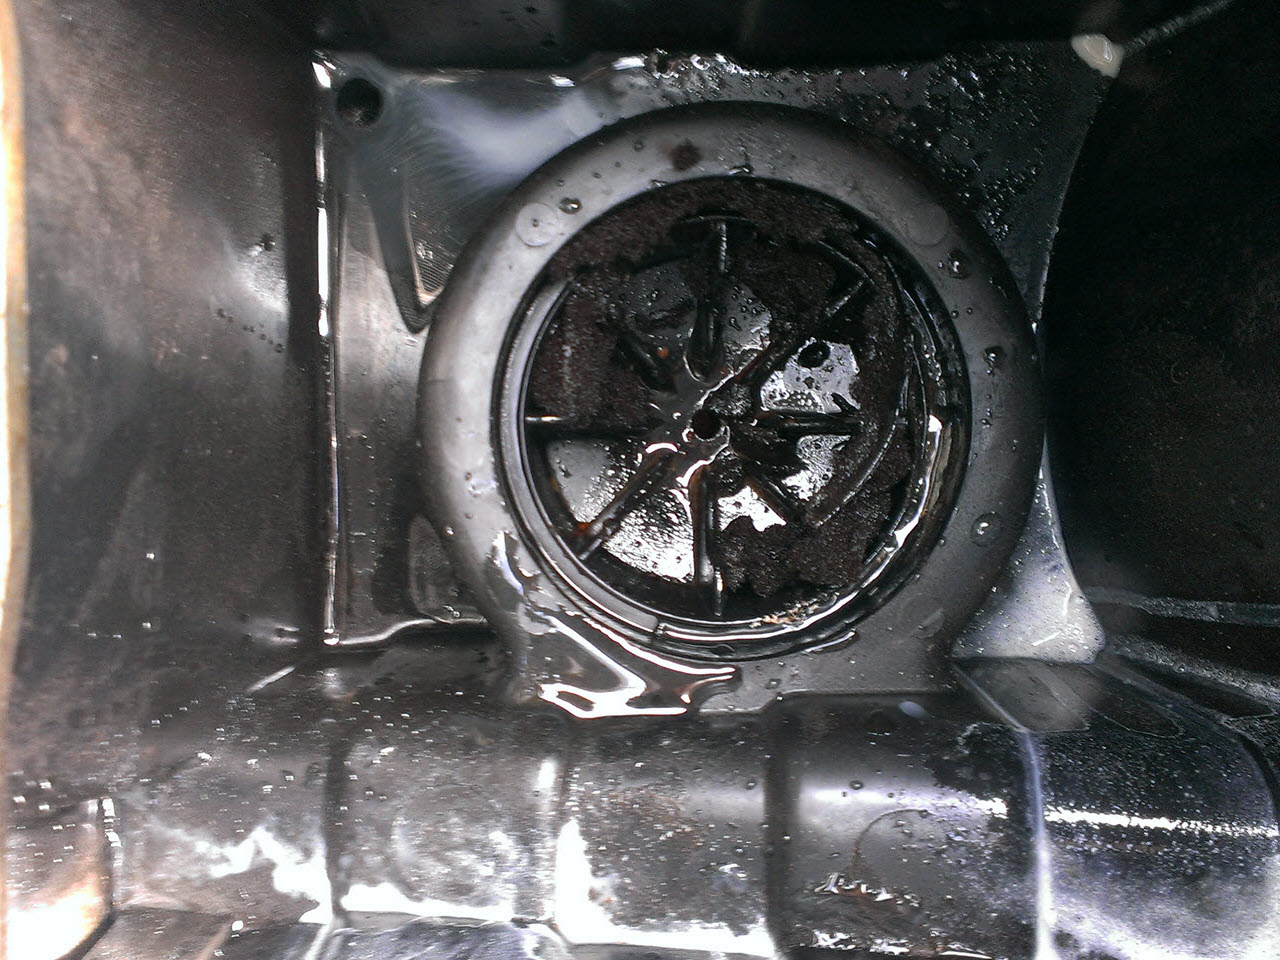
The foam turned into some kind of goop from old age and oil.
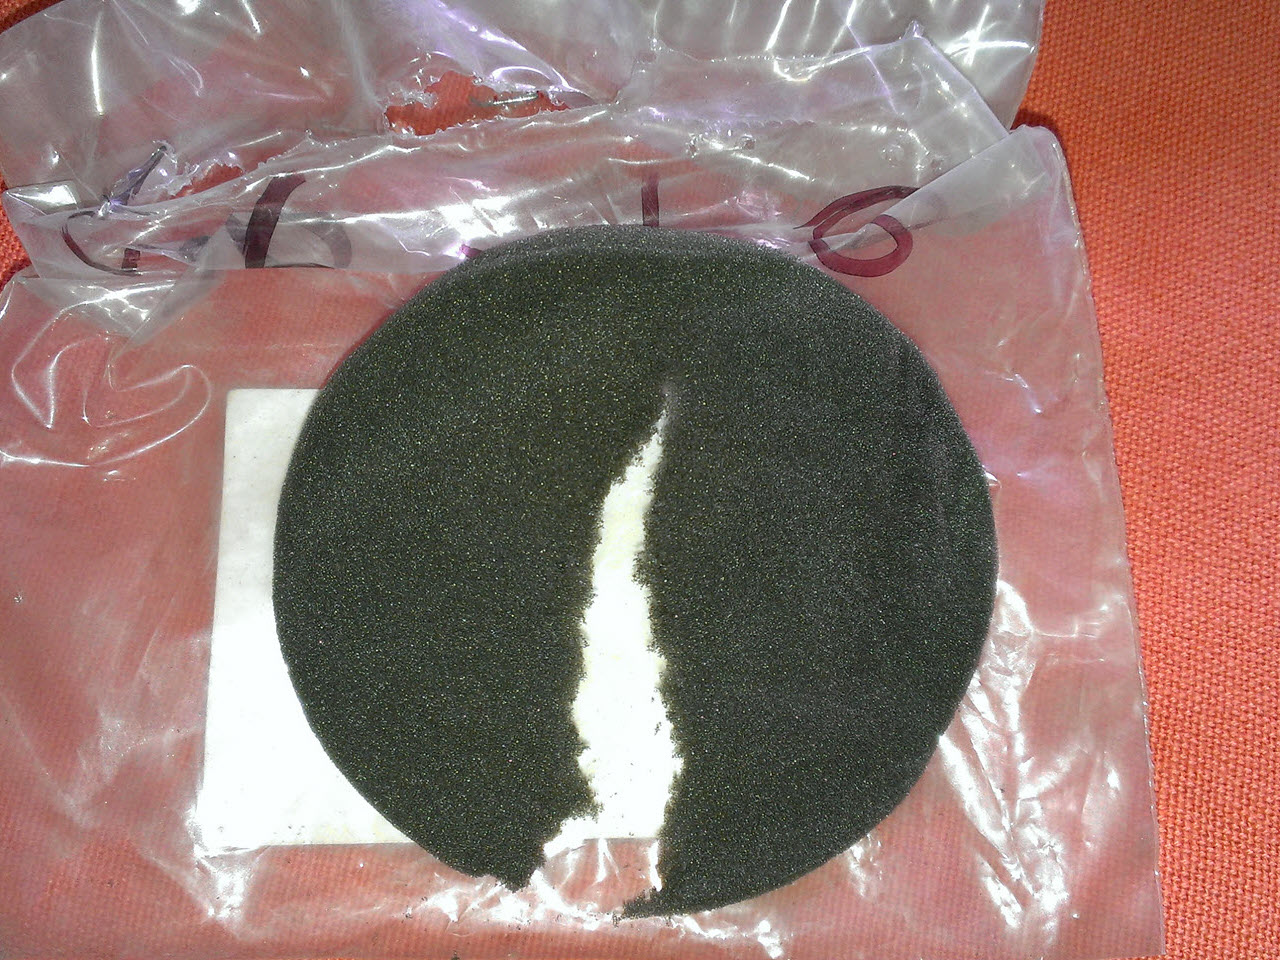
I ordered a NOS filter, but the foam on these broke down too. In the end I just stuck a stainless sponge down there to act as a filter.
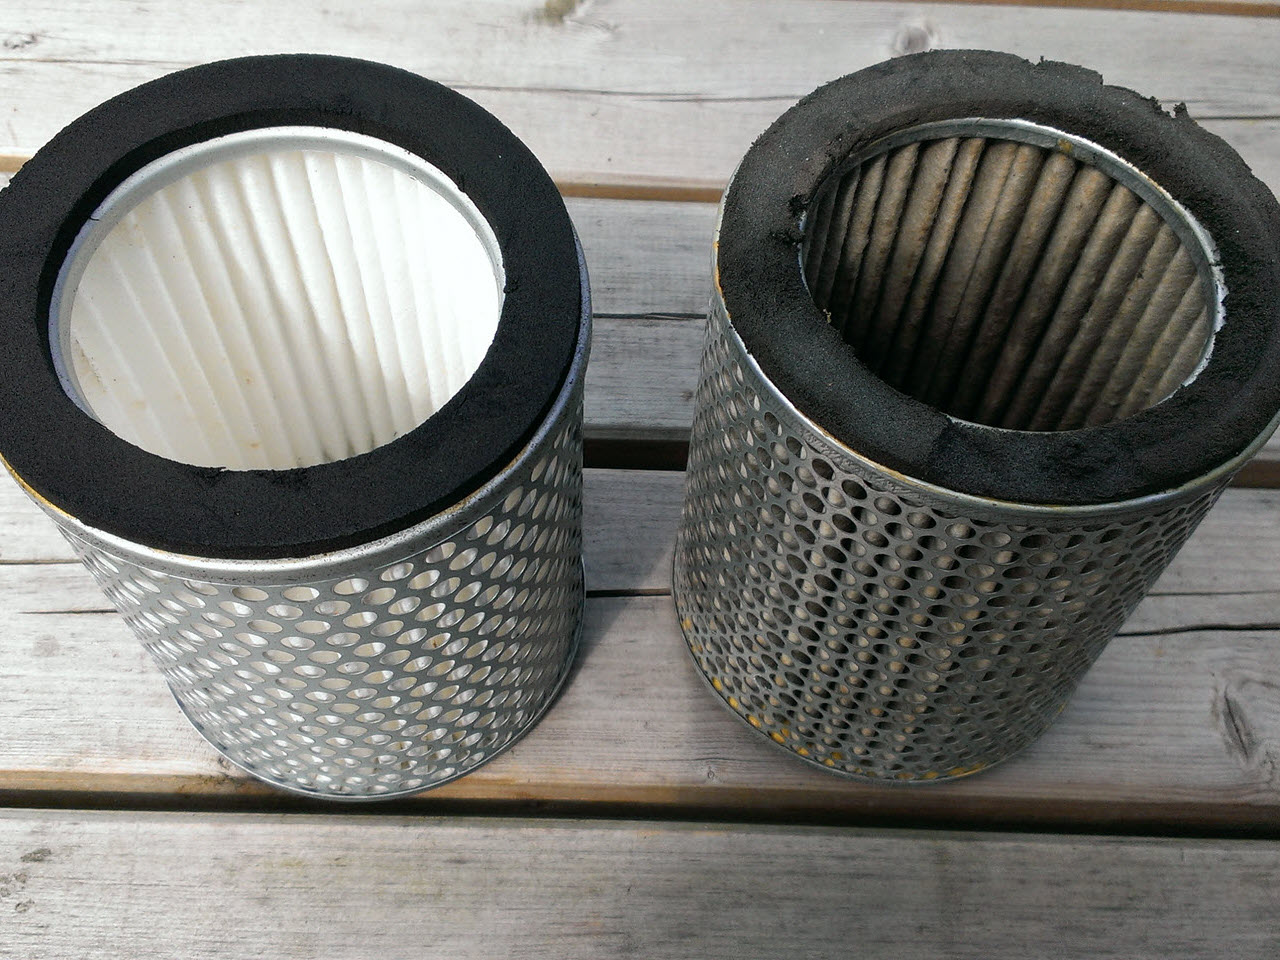
A comparison between the stock filter on the right, after cleaning by air pressure, and the new one.
Carburettor balancing
Since the carbs came apart completely, they needed to be synched.
A bench sync just brings you into the ballpark, the carbs need to be synched on the bike. There are several approaches to measure and compare manifold vacuum. Some people have built really cheap meters with clear hoses and oil, but knowing myself, I went for an off-the-shelf unit.
I bought a Morgan Carbtune, which works like a treat. To make it easier for me to synch the carbs, I added brass plugs to the cylinder head, replacing the original philips screws. These would be used in a later stadium for the Manifold Air Pressure sensor.
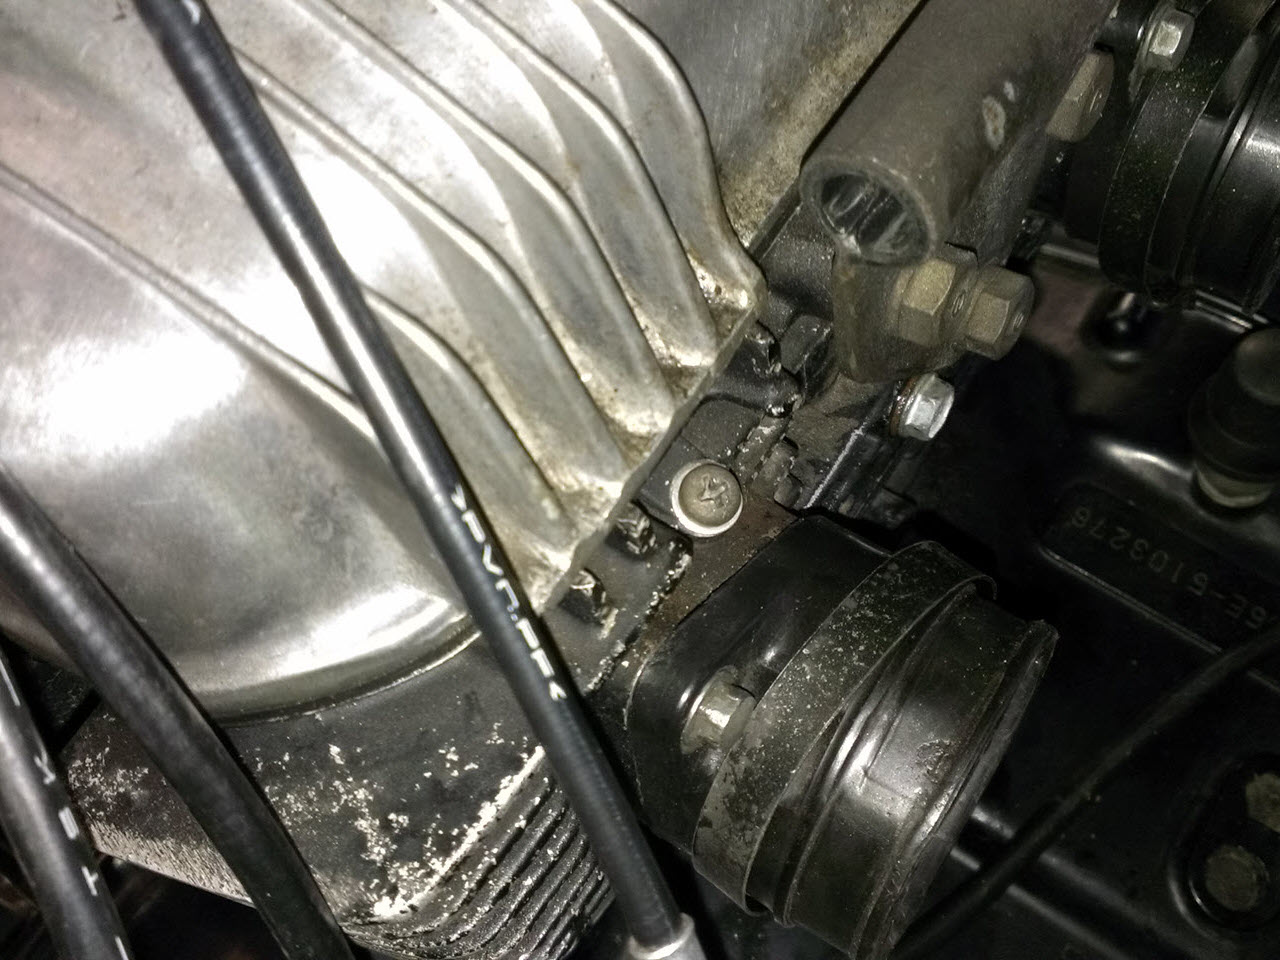
The stock philips screws
Brass plugs installed, I used thread sealant and a copper washer
They were initially covered by a rubber plug

After a bench sync, still quite a difference in vacuum between the two carburetors.
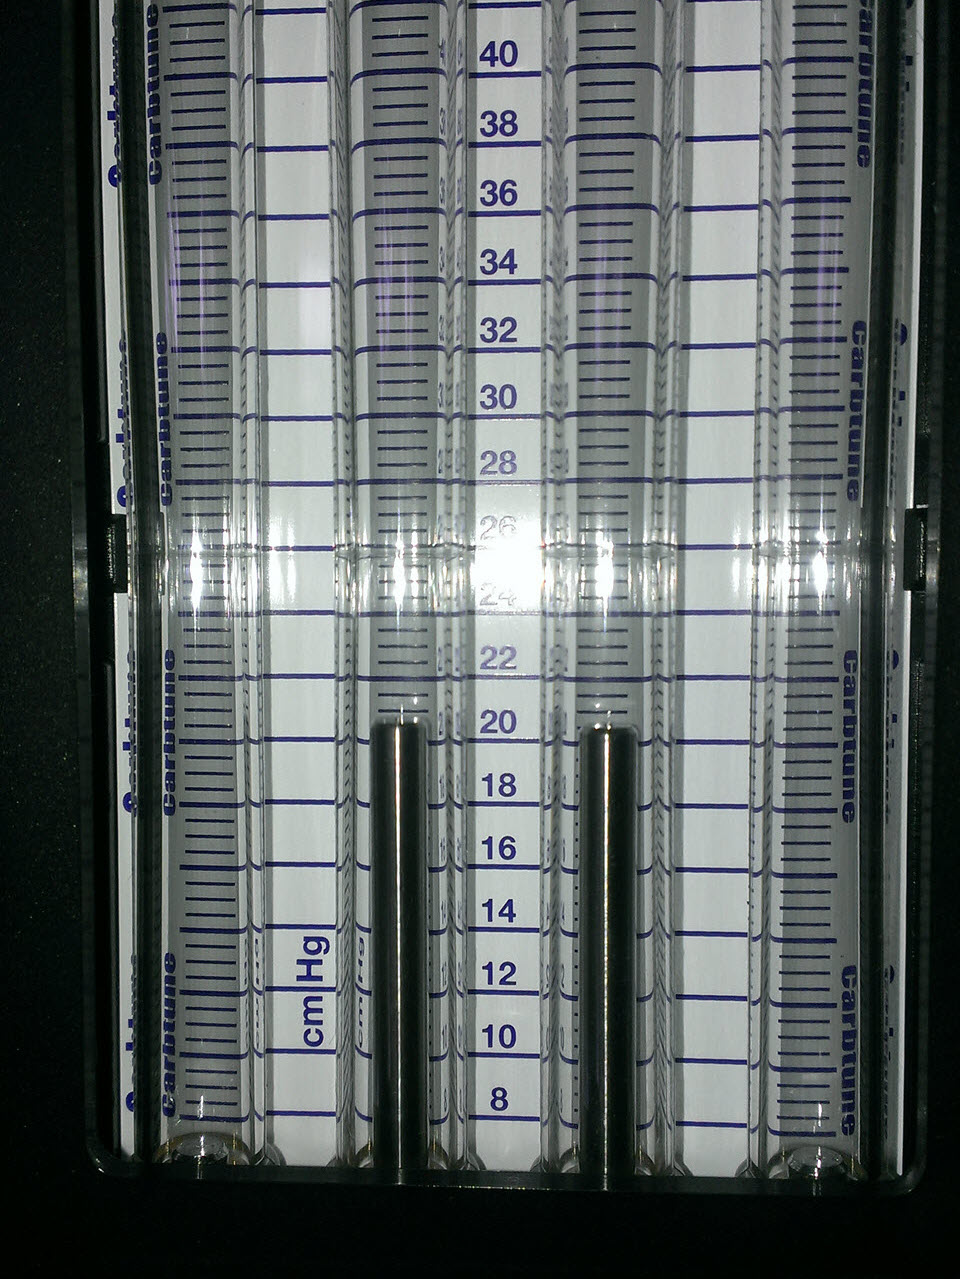
After a bit of fiddling with the set screw, the carbs run perfectly in sync.
The Next Level
AFR Sensor
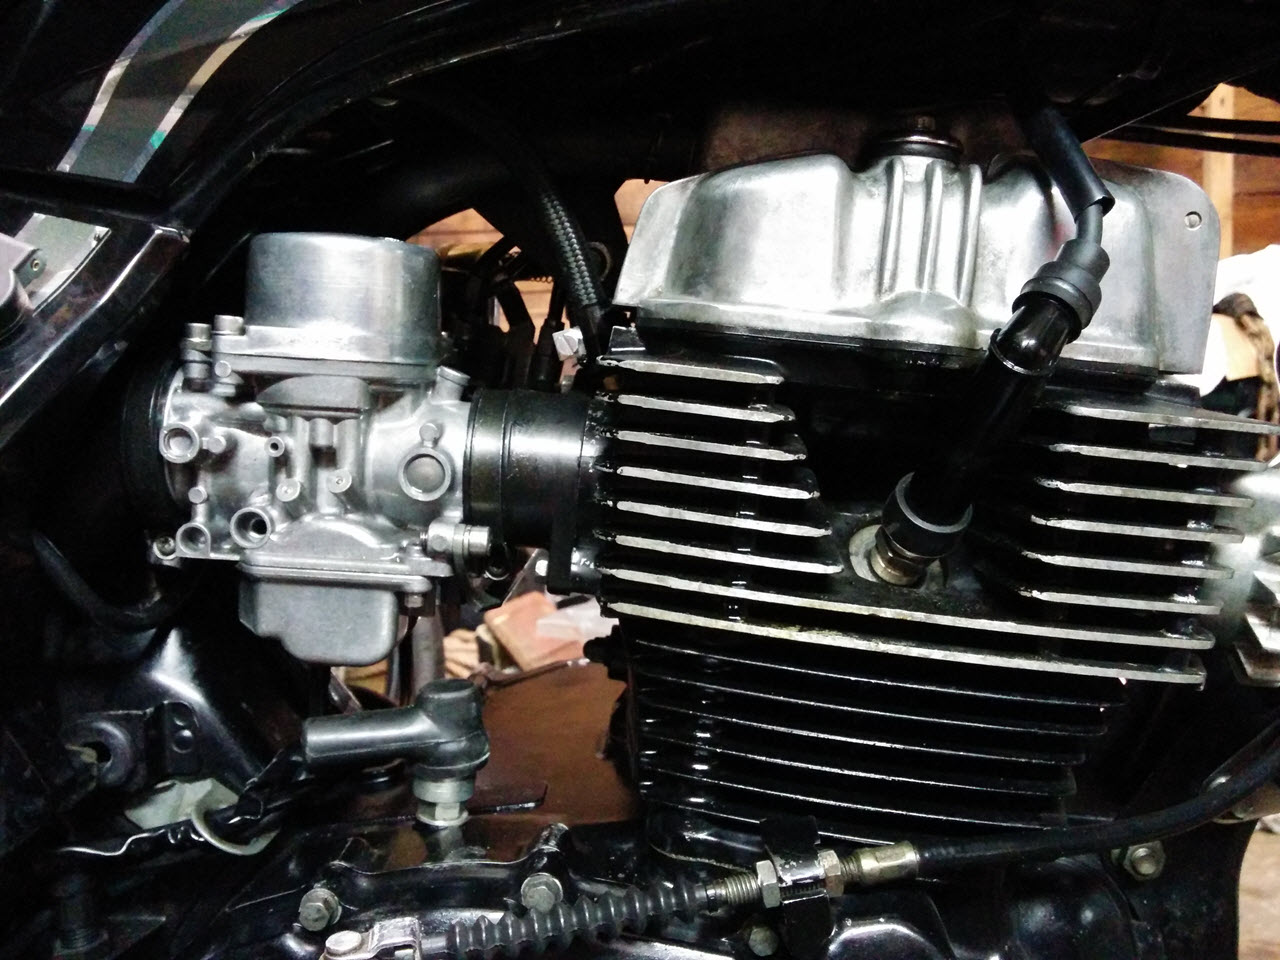
I did what I could to get the bike to run smooth and reliably, and it actually performed really well by the time I sorted out the ACV issue and had them synched. Without further fuel system mods, the bike went through France and over the Alps.
However, the bike consumed quite a bit of fuel in comparison to what other owners reported. They would get around 4,7-5,5l/100km, while my bike mostly resided in the 6-7l/100km range (and up).
Especially highway driving was a pain with this kind of consumption. That's why the K&N filter was installed in the first place, but it did not do much.
The problem was that I could not accurately measure the mixture under anything but idle/low load. I used too much guesswork, and the seat-of-the-pants dyno was not accurate enough.
The Colortune plug, however handy, is meant to measure the mixture at idle, it is way too hot to be used while driving.
In my opinion, the only 100% reliable way to tune an engine is by doing a dyno run. (Using the same dyno for each subsequent run) Unfortunately, those are pretty expensive. To save a lot of guesswork, I needed a consistent way to check how rich or lean the bike runs, in real world situations. I learned about AFR gauges and lambda sensors, and when I came across someone on Triumphrat who used an AFR gauge on one of these Honda twins, I decided to try that too.
After reading up on what the market had to offer, I pulled the trigger on TechEdge WBOO2 2J9 with a Bosch LSU4.9 wideband sensor. This is a much more complete package than the similarly priced offerings from eg. Innovate.
For example, it can be programmed, it can be used to log external data, and is modular to the point that you can attach your PC, multiple kinds of gauges or a different type of sensor.
This would save me some dyno time, and I would be able to tune the airbox and carbs easily myself. With this setup, I can go for a spin after each modification, even log the results to a file on my computer via a serial connection. I can also log RPM or other data from the ignition to my PC via the TechEdge sensor. It's not a replacement for a dyno run, but it comes damned close!
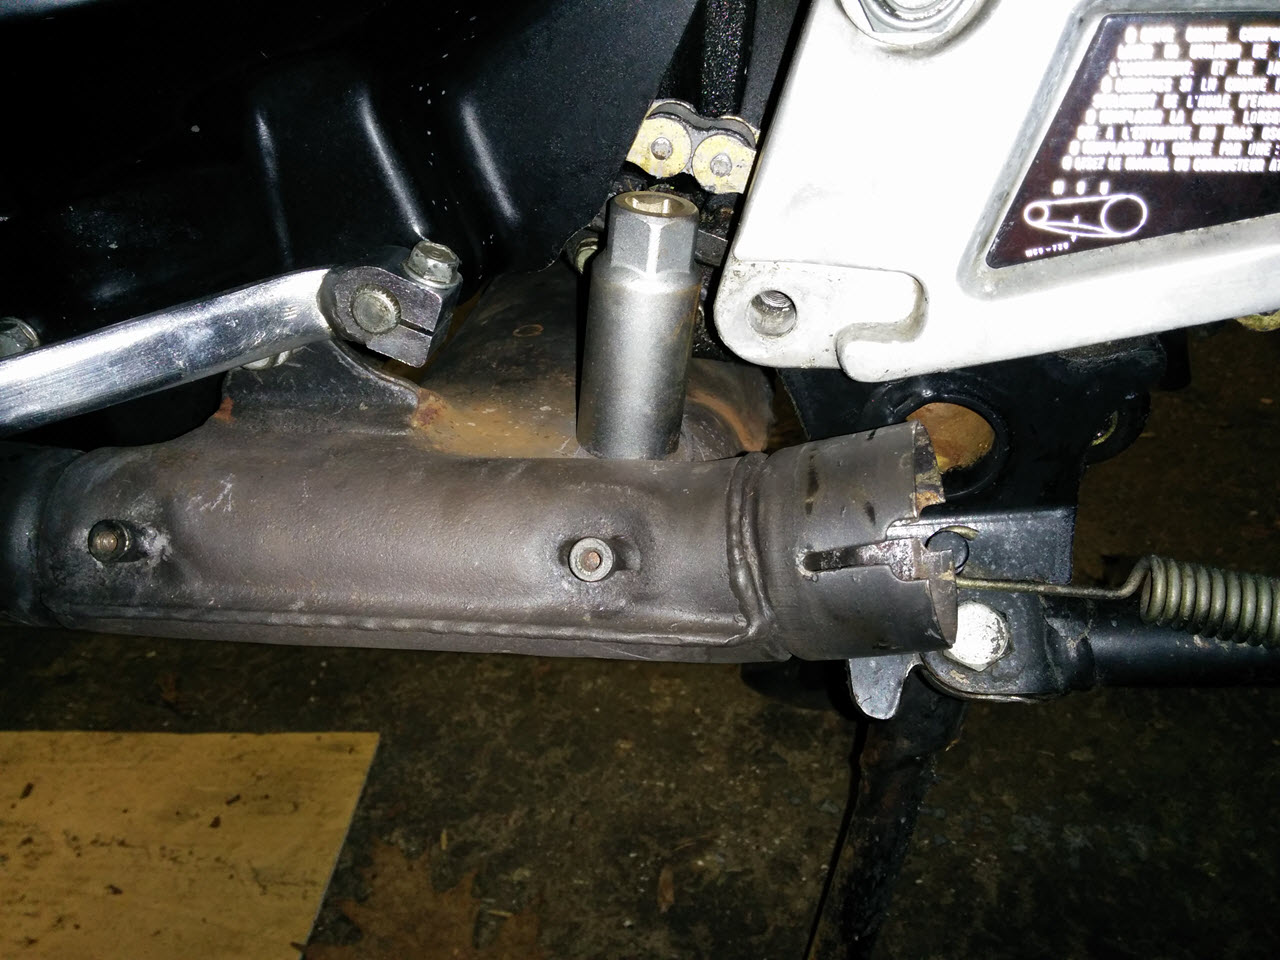
With the exhaust collector still on the bike, I tested several possible sensor locations before settling on this one.
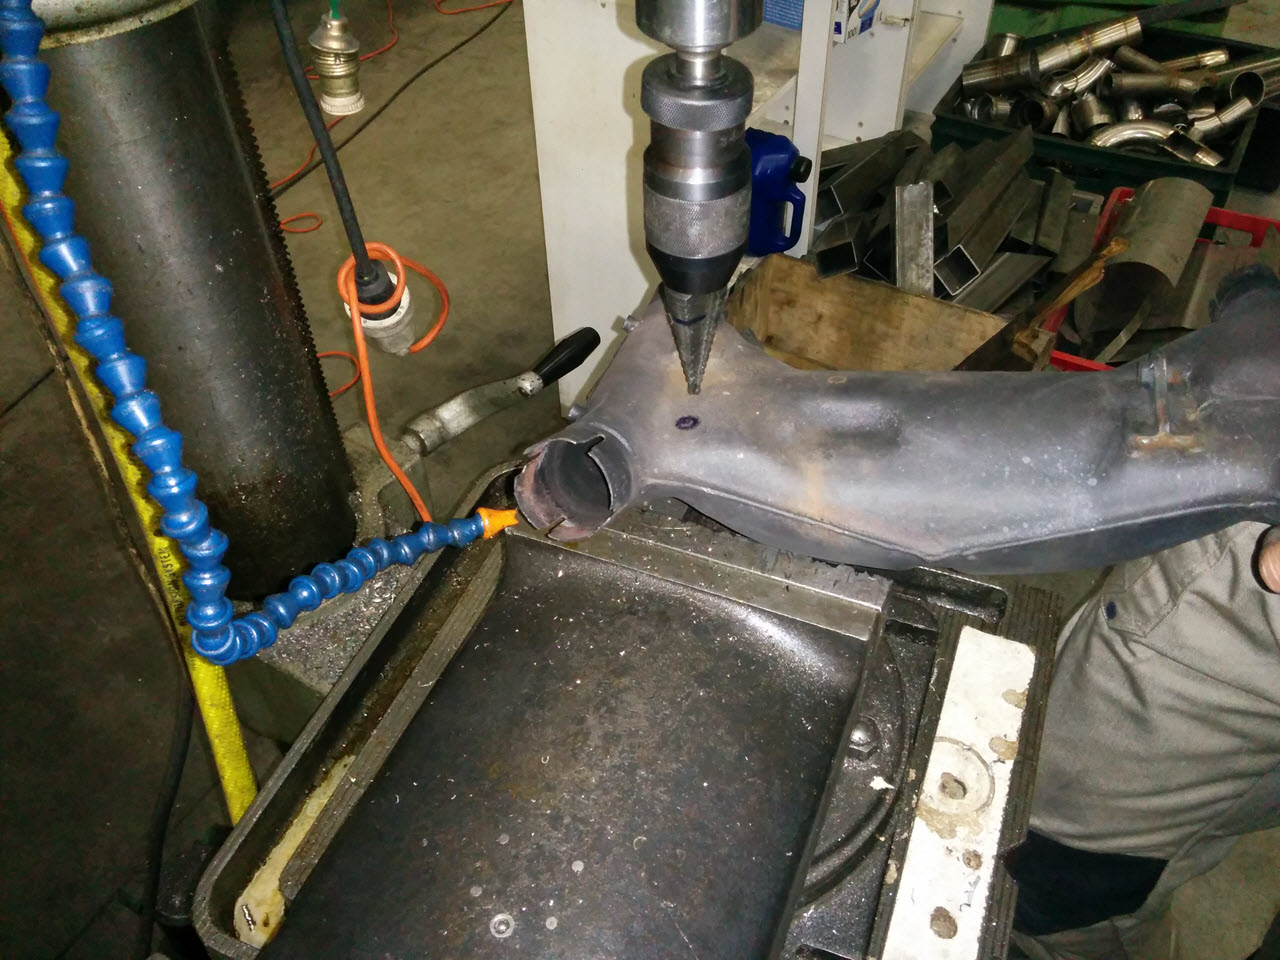
I went to have the collector drilled and a bung welded on, in the end they cut the hole with a plasma cutter instead of a drill.
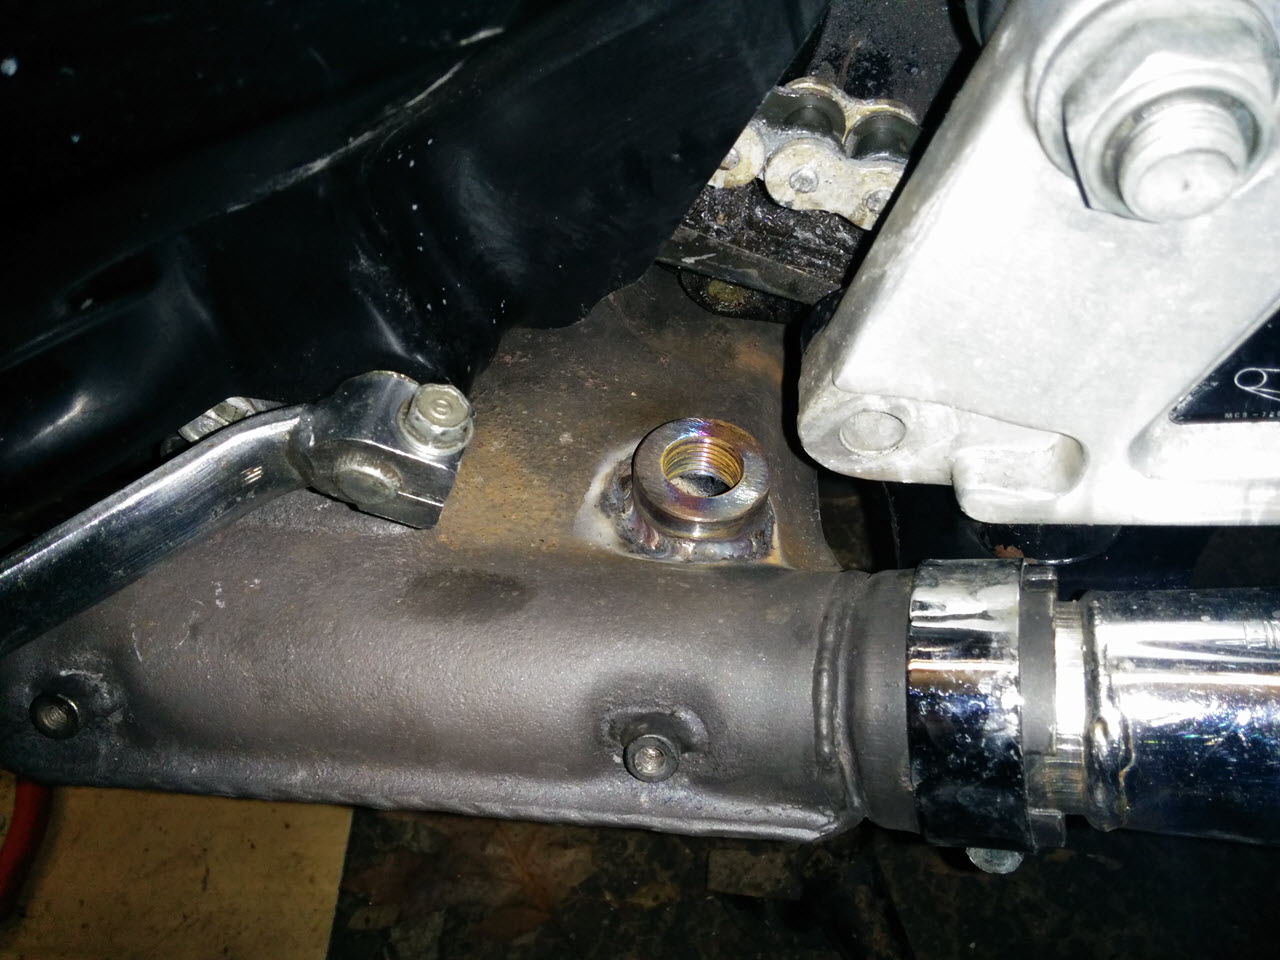
Here's the finished collector back on the bike.
There really is not a lot of room for the sensor, but it fits perfectly here.
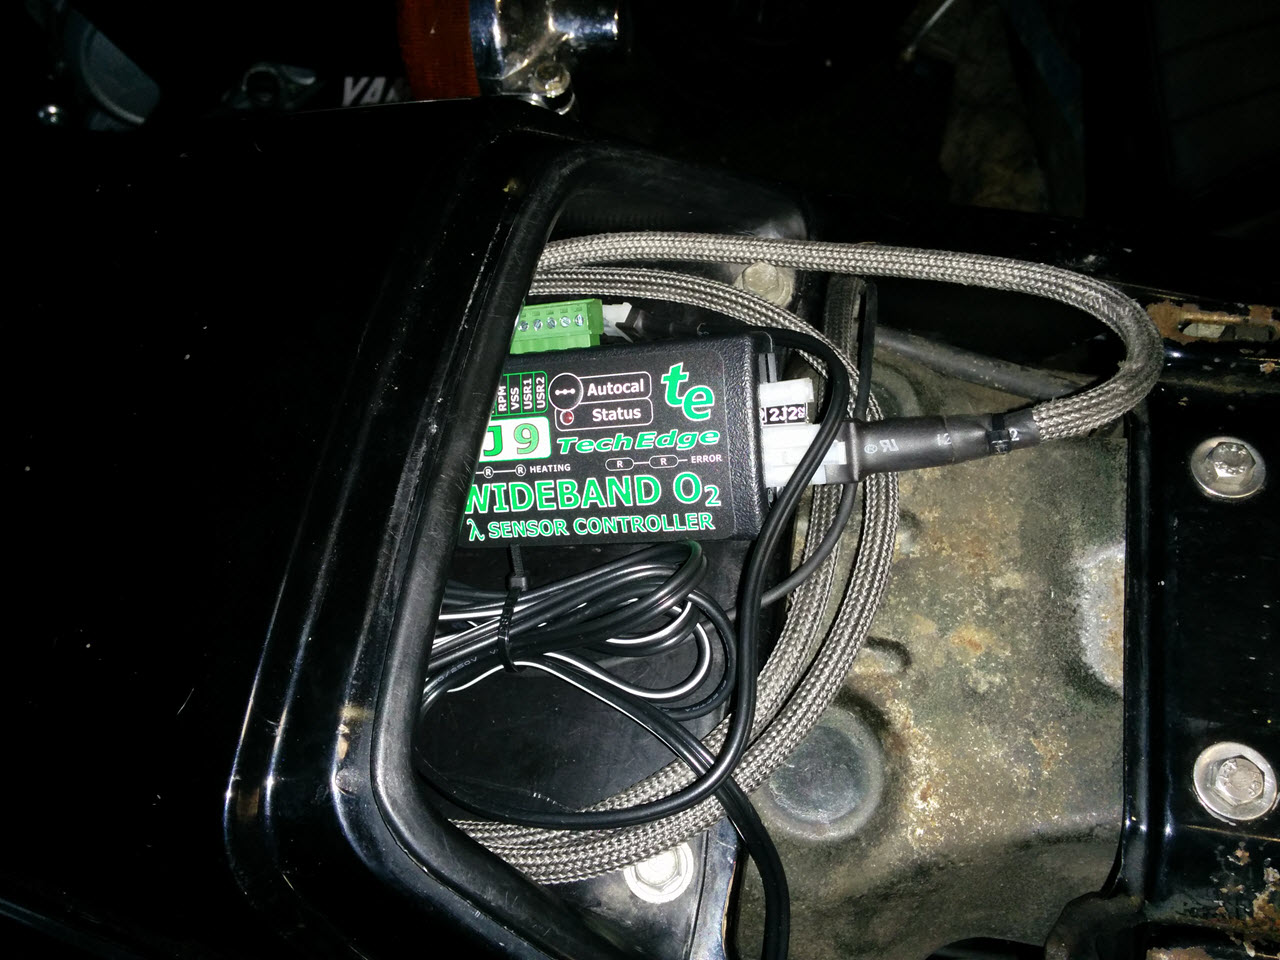
The computer went in to the small tray on top of the rear light.
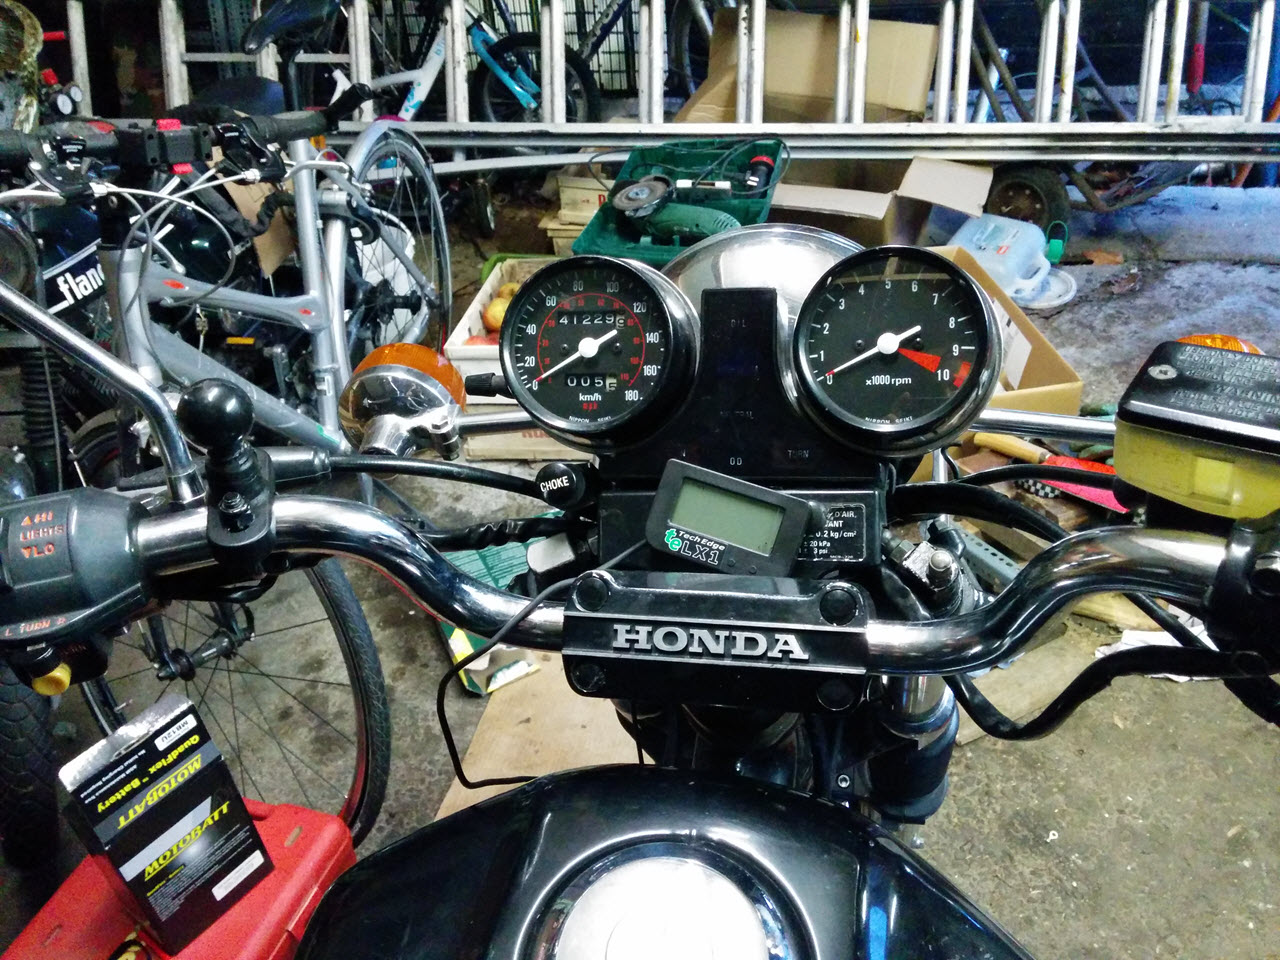
The gauge itself was taped to the handlebars.
Bigger, Better, more complex carburetors
The VB22 carburetors were a complete pain to tune. It seems like they reacted to each small intake modification by screwing up the AFR in a random RPM range.
The VB22G carburetors are "cumulative jetting" carburetors, with a single main jet. this means that the pilot jet provides (most of the?) fuel up until approximately 5000RPM. Each modification, each tuning attempt to make lean or rich spot disappear, ended up making the jetting worse at a different RPM. On top of being difficult to tune, the pilot jets are about 3 times as expensive as a normal main jet and are difficult to source.
This led me to contemplate a carb switch. The older VB21 carburetors are well-known in the Hondatwins community, both for having a bigger venturi (32mm instead of 30mm) and for having dual main jets. This means a pilot jet, that does nothing but the idle jetting, a primary main, which does approx 3000-5500rpm and a secondary main, which fuels the rest of the rev range. These carbs are "progressive jetting", meaning that each next circuit mostly replaces the one before.
They are both expensive and difficult to come by though, and since they were only used on US bikes, can only be found on the other side of the planet. I learned that VB31 carburetors are mostly the same, and were used on bikes sold in the EU. I contacted a junkyard, they had some pairs VB31 carburetors in stock, and I bought a set.
The carbs were moderately dirty, a bit of corrosion and rust. Type VB31G.
When the carbs arrived, I noted that they were VB31G. It was immediately apparent that they were extremely similar to the VB22 carbs. I knew the VB21 carbs had a pressed-in idle jet, and was prepared to deal with that inconvenience.
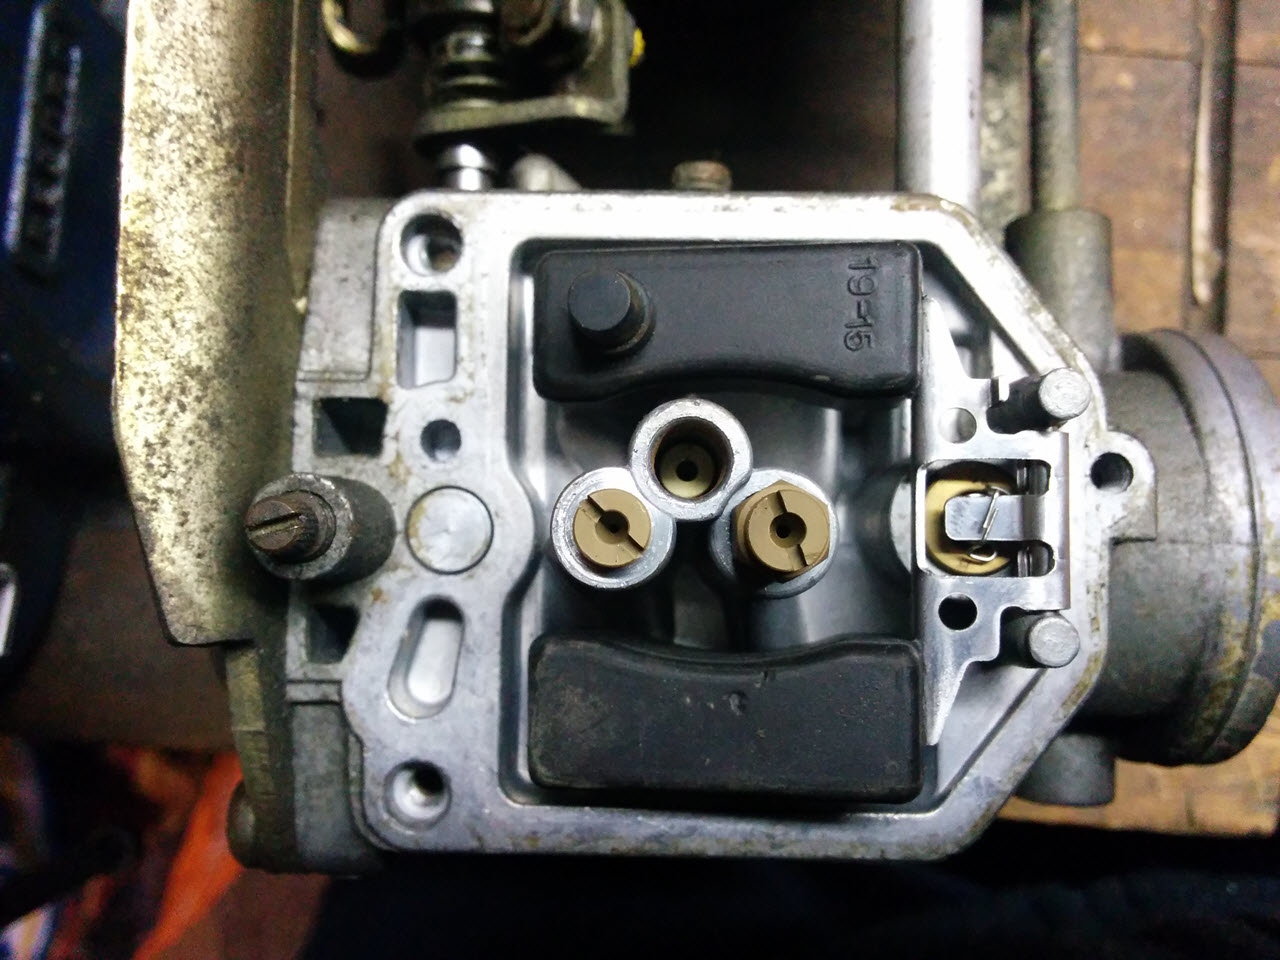
When I opened up the bottom, I was greeted by a set of orange, non-adjustable floats. When I had a look at the idle jet, it appeared slotted instead of smooth on top. I reluctantly and carefully tried screwing one out, and lo and behold... These carbs have a screw-in pilot!
This meant that I could fully clean adjust ALL jets!
I used an ultrasonic cleaner to get the carbs in like-new state.
Bottom off, pretty clean, but old
The discovery of the screw-in pilot jet made my day
Got to love ultrasonic cleaning
The carburetors came off a CB400T. The jets that were installed were a 40 pilot, 72 primary main and 110 secondary main.
Because of the K&N filter, I used a 42 pilot (screw 1.75 turns out for ~13AFR), a 72,5 primary main and a 115 secondary main. The jets I used were Keihin pattern jets, and sizing is supposed to be the same. The carbs had brass needles, that were a bit worn, but seemed to be almost 100% identical to the "61C" needles I bought earlier, so I fitted those.
Once the carbs were clean, I shamelessly mixed and matched with parts from the VB22 and VB31 carbs until I had the perfect pair.
Mixing and matching. I reused all the SS allen bolts from the VB22, the vacuum pistons and the needle jets.
Shiny bottom and needle jet

Again used never-seez on all of the fasteners
The bike fired up immediately, AFR was right, but a tad rich
With the new carbs, I bought a set of intake rubbers, airbox side. I saw on the junkyard's site that they were a tad different than the Nighthawk's intake boots, so I was curious. These are hard to come by without buying a whole airbox, worst case scenario I just had a set of spares. I threw them into the ultrasonic cleaner and was suprised at how well it worked. It beats cooking them in glycerine by FAR. the rubbers came out very pliable and sparkling clean.
These serve as velocity stacks to the carbs. Because of the bigger bore carburetors, a longer intake helps speed up the intake air at lower revs. They are overall 10mm longer than the stock rubbers, and protrude fully into the airbox. I thought the original rubbers were a pain to install, but these make me never want to take off the carbs ever again.
Stock size on top (from the parts bike), CM400T on the bottom
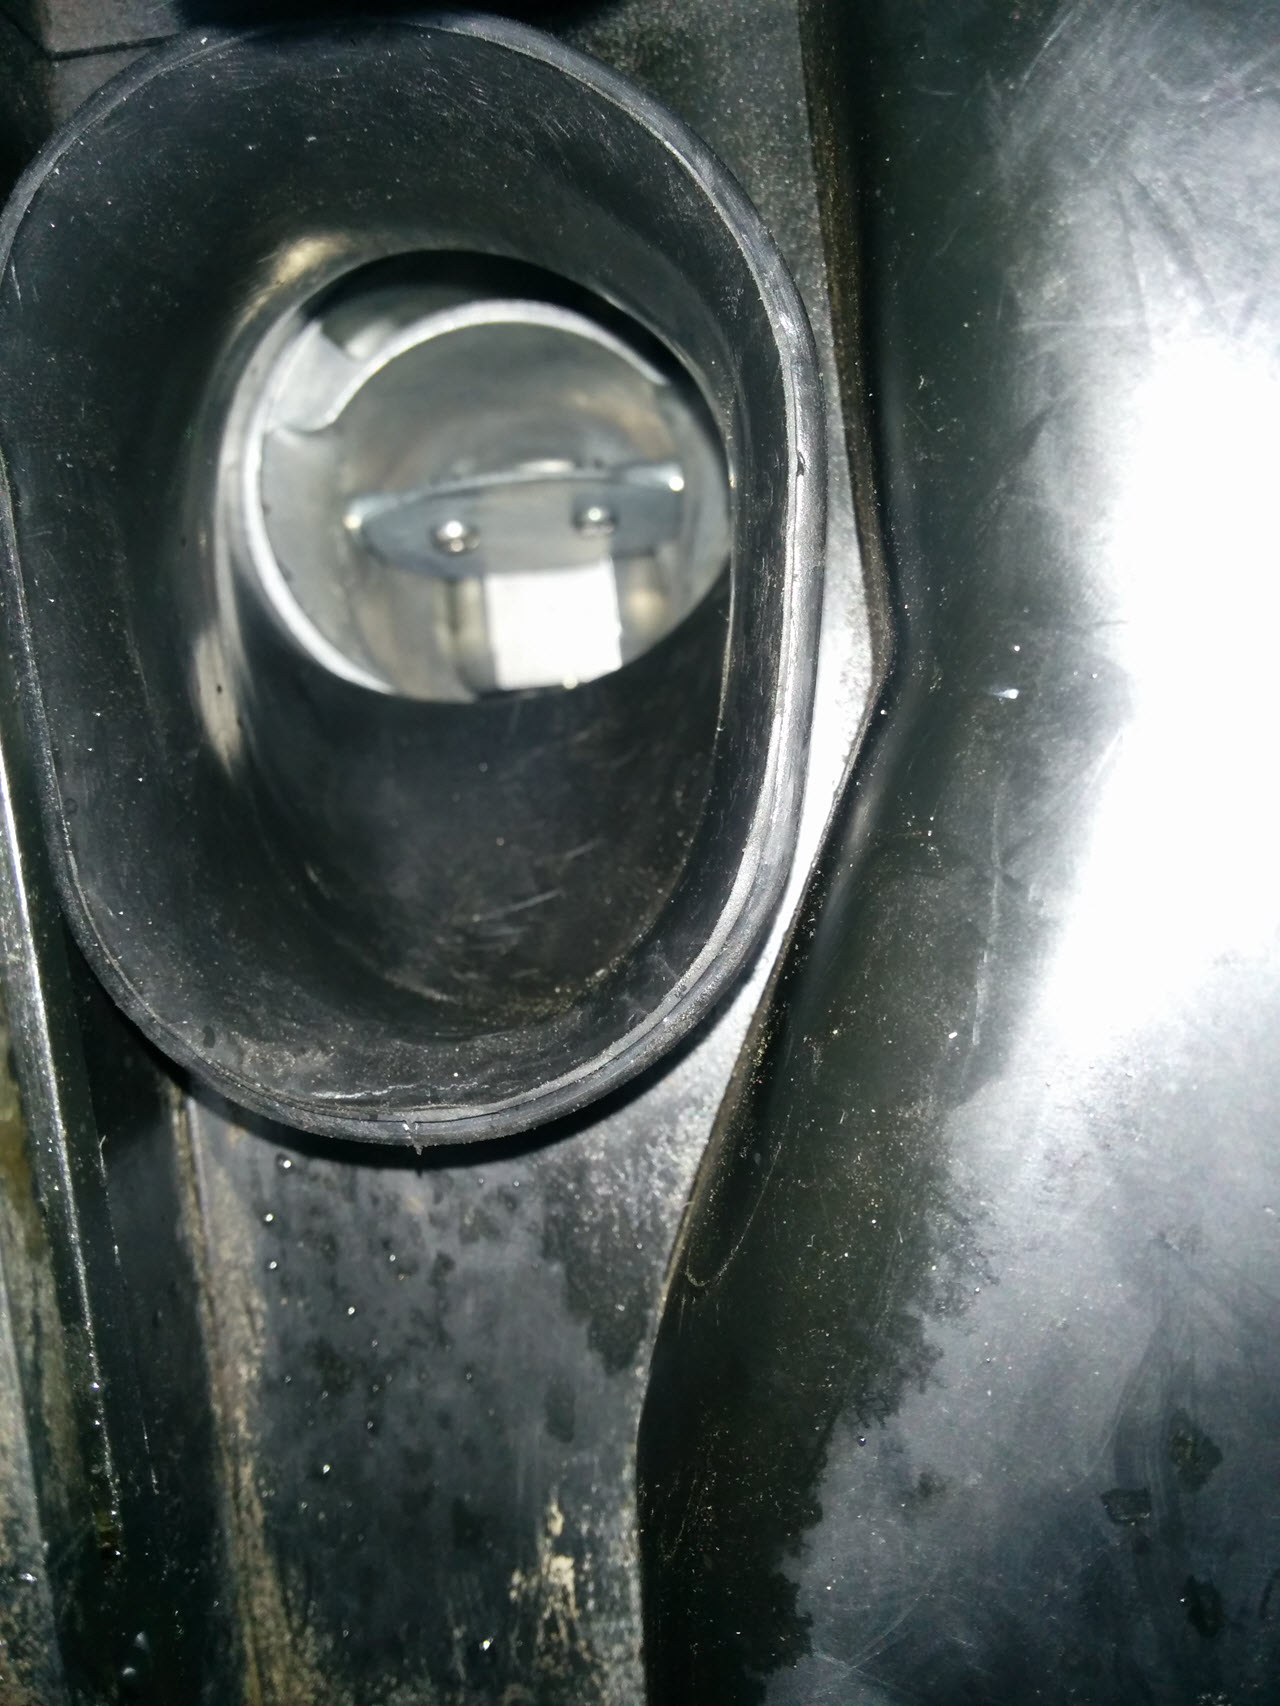
A view from inside the airbox
Suddenly, another package arrived from the junkyard. In it, my order fully duplicated. Another set of carbs and jets, same invoice number, same everything. They made a mistake and accidentally sent my order twice.
I notified the junkyard of their mistake, and they let me keep the carbs. Since the carbs that were in this order were different (older), though in a bit better condition (less oxidation and little to no rust on the ferro parts).
They were VB31B type carbs. Opened up the bottom, and was greeted by black adjustable floats! Under the rubber plugs were pressed-in idle jets..
AC valves were also bulb type, but with a longer, straight spring. Vacuum piston springs were completely different, a lot shorter. Needle was the same, jets were: unknown pilot, 72 primary main, 110 secondary main.
VB31G: non-adjustable float, later model bulb-type ACV valves, long vacuum piston spring, screw-in pilot jet
VB31B: adjustable float, bulb-type ACV valves with straight springs, short, soft vacuum piston spring, pressed-in pilot jet